Boo who?
You!
Yes, You! ;)
I have a sneak peek of a project that I made for this month's Paper Crafter's Sampler to share with you......And BOY - did I ever have fun putting it together!!!!
Do you want to take a sneaky peeky? Ok...... :)
Head on over to Paper Crafter's Sampler if you would like to join up in the fun - and if you decide to subscribe, be sure to tell Mel that Regina sent you - use the code PCSRC.
Toodles Stamping Friends!!!
Showing posts with label fall. Show all posts
Monday, September 24, 2012
Amidst Autumn
Hey Everybody!!!!
Guess what? It is that time again!!! Time for another Sneeky Peeky of The Paper Crafters Sampler!!!!
I had a TON of fun whipping up my project this month!!! Wanna take a peek?
Head on over to The Paper Crafters Sampler and check it out - if you decide to sign up and join the fun, be sure to tell Melanie that Regina sent you. Use the code PCSRC please :)
Have a wonderful day!
Labels:
3 dimensional,
big shot,
fall,
halloween,
PCS
Tuesday, September 27, 2011
I'm falling for you -
:)
Hi Everyone!!! Can you believe it????? Two days in a row??? I just had to participate in the Create with Connie and Mary Challenge this week - I LOVED the sketch! Well - I love all of the challenges, but actually had time to carve out for this one.....if there were only about three more days in a week - don't you feel that way sometimes? hehe! Wanna see the sketch??
That is a nice one, huh? And guess what? I pondered on it for a couple of days and decided on pairing up the Gently Falling set from the mini with the Spice Cake fabric - also from the mini ( ;) ) with some totally essential stamps that are from the set French Foliage - it is in the current idea book and catalog - but it was in last year's holiday mini.......do you see a great love of the leaf sets that come out in the holiday minis and me? hehehehheeee.......
Oh Yeah - I bet you are wondering what I did??? I kind of got a bit side tracked - sorry ;)
Well? you like? I used some torn strips of the fabric in place of the three horizontal strips on the sketch - LOVE that!! The leaves are more mustard, pool party and pear pizzazz topped with an outline of soft suede. I then went over the entire panel with the three ESSENTIAL stamps from french foliage - the circle paris stamp, the tiny text stamp and the ink blot looking thing - those three stamps could be piled onto anything and it would look Great!!! And the sentiment comes from Hand Penned, also from the mini - what a gorgeous stamp set!! Take a closer look at the "stress" my main image panel went through:
that was great fun to rip, tear and dirty up!!
Oh, I don't want to forget - I also did up the inside, of course.....I can't hardly complete a card without doing it, huh??
Well - what do you think?
Hi Everyone!!! Can you believe it????? Two days in a row??? I just had to participate in the Create with Connie and Mary Challenge this week - I LOVED the sketch! Well - I love all of the challenges, but actually had time to carve out for this one.....if there were only about three more days in a week - don't you feel that way sometimes? hehe! Wanna see the sketch??
That is a nice one, huh? And guess what? I pondered on it for a couple of days and decided on pairing up the Gently Falling set from the mini with the Spice Cake fabric - also from the mini ( ;) ) with some totally essential stamps that are from the set French Foliage - it is in the current idea book and catalog - but it was in last year's holiday mini.......do you see a great love of the leaf sets that come out in the holiday minis and me? hehehehheeee.......
Oh Yeah - I bet you are wondering what I did??? I kind of got a bit side tracked - sorry ;)
Well? you like? I used some torn strips of the fabric in place of the three horizontal strips on the sketch - LOVE that!! The leaves are more mustard, pool party and pear pizzazz topped with an outline of soft suede. I then went over the entire panel with the three ESSENTIAL stamps from french foliage - the circle paris stamp, the tiny text stamp and the ink blot looking thing - those three stamps could be piled onto anything and it would look Great!!! And the sentiment comes from Hand Penned, also from the mini - what a gorgeous stamp set!! Take a closer look at the "stress" my main image panel went through:
that was great fun to rip, tear and dirty up!!
Oh, I don't want to forget - I also did up the inside, of course.....I can't hardly complete a card without doing it, huh??
Well - what do you think?
Labels:
cards,
ccmc,
challenges,
fall
Saturday, September 3, 2011
Let's back things up a bit, shall we?
Hi All!!!
I gave you a taste of Christmas last week with the stockings - but I feel like I needed to back it up a bit - maybe back to the season at hand. Well - back to school plus one......how about some halloween eye candy? LOL!!!
Guess What!?!?!?!? I finally got to bring an idea to fruition this morning.......it has been a busy week so this was the first time I got to sit down in my studio to get inky. You know where I went first for inspiration, right??? Oh yeah - the Create with Connie and Mary challenge!!! This week it was a color challenge. Wanna see?
What did you immediately think of when you saw it??? I mean - the "first thing" you thought of???? I immediately thought - Greeting Card Kids. Really - that is what I first thought of.......honestly - pinky swear ;) Want to see what I cooked up this week? Well, if you don't turn your head.....you are about to see it- LOL!!
Isn't she the sweetest little witch? We will start with the card and move up to her, shall we? You know me - I always have to add a bit of creative liberty - and add a neutral or two......so I went with a basic black card base and cut a panel from First Edition - an absolute MUST have pack of designer series paper - just sayin'. ;) I then stamped it with the flourish from Creative Elements in pumpkin pie. I'm gonna LOVE that stamp - I am just warning you now - I can see it being on everything - e.v.e.r.y.t.h.i.n.g.
And when you think of halloween - you immediately think of a "baby themed" pack of designer series paper, right? Of course you do - so I pulled out Nursery Nest for the addition of pear pizazz. The rich razzleberry panel is from the brights designer paper pack. Did you notice the same flourish stamped on those panels with basic black ink??? I warned you ;) I sewed the rich razzleberry, pumpkin pie and basic black buttons right onto the panel with linen thread before adhering it to the card - that way - you do not have to worry that the adhesive will allow the buttons to come off - and it only takes a second to pierce holes where the button holes are and tie linen thread through them. easy peasy - i swear.
Now onto that adorable little witch - wanna see her a little closer???
I stamped her onto watercolor paper with black staz on ink. She was then colored in with ink refills and an aquapainter. I did have to add a small glow of so saffron ink around her - if I have said it once, I have said it a million times - watercolored images need some sort of "grounding" - in my opinion - for what I know....which isn't much - lol!!! It is very subtle looking at the card, but it really does make the image pop out. Did you see her hat buckle??? No? - go back up and look - I colored it with gold smooch ink. She was then punched with the 2 1/2 inch circle punch. And see that scalloped circle around her???? It is from the NEW Perfect Pennants Bigz L die - LOVE that there are two scallop circle dies on there - YAY!!!!!! The sentiment is from Teeny Tiny Wishes (no shock there from me, huh? lol) If you look closely enough - the flourish from Creative Elements is also stamped there in pumpkin pie, it is stamped off so it is subtle - but it is there :) All edges of the card are sponged with basic black ink - I had to dirty it up a bit.........had to.
Wait!! There is more - I did up the inside as well. Wanna see?
The sentiment there is from Grateful Greetings -
Well - what do you think of this little sweetie? She sure was fun to bring to life. Now - go stamp some goodness, it is good for your mental stability, really...........
I gave you a taste of Christmas last week with the stockings - but I feel like I needed to back it up a bit - maybe back to the season at hand. Well - back to school plus one......how about some halloween eye candy? LOL!!!
Guess What!?!?!?!? I finally got to bring an idea to fruition this morning.......it has been a busy week so this was the first time I got to sit down in my studio to get inky. You know where I went first for inspiration, right??? Oh yeah - the Create with Connie and Mary challenge!!! This week it was a color challenge. Wanna see?
What did you immediately think of when you saw it??? I mean - the "first thing" you thought of???? I immediately thought - Greeting Card Kids. Really - that is what I first thought of.......honestly - pinky swear ;) Want to see what I cooked up this week? Well, if you don't turn your head.....you are about to see it- LOL!!
Isn't she the sweetest little witch? We will start with the card and move up to her, shall we? You know me - I always have to add a bit of creative liberty - and add a neutral or two......so I went with a basic black card base and cut a panel from First Edition - an absolute MUST have pack of designer series paper - just sayin'. ;) I then stamped it with the flourish from Creative Elements in pumpkin pie. I'm gonna LOVE that stamp - I am just warning you now - I can see it being on everything - e.v.e.r.y.t.h.i.n.g.
And when you think of halloween - you immediately think of a "baby themed" pack of designer series paper, right? Of course you do - so I pulled out Nursery Nest for the addition of pear pizazz. The rich razzleberry panel is from the brights designer paper pack. Did you notice the same flourish stamped on those panels with basic black ink??? I warned you ;) I sewed the rich razzleberry, pumpkin pie and basic black buttons right onto the panel with linen thread before adhering it to the card - that way - you do not have to worry that the adhesive will allow the buttons to come off - and it only takes a second to pierce holes where the button holes are and tie linen thread through them. easy peasy - i swear.
Now onto that adorable little witch - wanna see her a little closer???
I stamped her onto watercolor paper with black staz on ink. She was then colored in with ink refills and an aquapainter. I did have to add a small glow of so saffron ink around her - if I have said it once, I have said it a million times - watercolored images need some sort of "grounding" - in my opinion - for what I know....which isn't much - lol!!! It is very subtle looking at the card, but it really does make the image pop out. Did you see her hat buckle??? No? - go back up and look - I colored it with gold smooch ink. She was then punched with the 2 1/2 inch circle punch. And see that scalloped circle around her???? It is from the NEW Perfect Pennants Bigz L die - LOVE that there are two scallop circle dies on there - YAY!!!!!! The sentiment is from Teeny Tiny Wishes (no shock there from me, huh? lol) If you look closely enough - the flourish from Creative Elements is also stamped there in pumpkin pie, it is stamped off so it is subtle - but it is there :) All edges of the card are sponged with basic black ink - I had to dirty it up a bit.........had to.
Wait!! There is more - I did up the inside as well. Wanna see?
The sentiment there is from Grateful Greetings -
Well - what do you think of this little sweetie? She sure was fun to bring to life. Now - go stamp some goodness, it is good for your mental stability, really...........
Thursday, August 25, 2011
New Scoring Board Stamp Camp Project
Hi Stampers!!!
Here is the project you can make for $8 with the purchase of the BRAND NEW Scoring Board that Stampin' Up! is releasing in the Holiday Mini Catalog on September 1st - it is AMAZING!!!!
So, if you are intersted in the camp, check your email if you are on my mailing list or leave me a comment at the bottom of this post. For local attendees only unless you are able to pick up supplies from me.
Here is the project you can make for $8 with the purchase of the BRAND NEW Scoring Board that Stampin' Up! is releasing in the Holiday Mini Catalog on September 1st - it is AMAZING!!!!
So, if you are intersted in the camp, check your email if you are on my mailing list or leave me a comment at the bottom of this post. For local attendees only unless you are able to pick up supplies from me.
Labels:
3 dimensional,
class to go,
fabric,
fall,
gifts,
new goodies,
stamp camps
Saturday, October 30, 2010
Out of Retirement :)
LOL!!!!
Did you think I meant me being out of stamping retirement??
No silly - I meant I have used some retired stuff on this project. I wanted to make a little something special for my daughter and her DIVA friends as the moms call them. We all met last night for dinner - kid's choice - McDonald's......they really need to start selling "drinks" if you know what I mean....hehehe!!! ( I don't even drink - but it does sound appealing on trick or treat night.....) After the girls ate, we headed out for the local parade and some door to door begging for a tootsie roll. lol!
So, I made these for the girls - hopefully they are DIVAish enough :)
The purse was made of the top note die and the scallop oval frame die and the big shot. The designer series paper is retired- I forget what the name of it is off the top of my head. I also used the big shot and the sans serif alphabet dies to make their purses monogrammed. :) It is hard to see in the picture, but the letters are outlined with black glitter. Gotta start them out early, right ??? hehehe!!
We are going to see my daughter's step cousins tonight,so I wanted to make them a treat bag too. More retirees here, but there are some fun new things also.
Well, I better run....2 1/2 million more thing to accomplish this morning. Hubby would be proud, I am already doing laundry....lol!!!
Did you think I meant me being out of stamping retirement??
No silly - I meant I have used some retired stuff on this project. I wanted to make a little something special for my daughter and her DIVA friends as the moms call them. We all met last night for dinner - kid's choice - McDonald's......they really need to start selling "drinks" if you know what I mean....hehehe!!! ( I don't even drink - but it does sound appealing on trick or treat night.....) After the girls ate, we headed out for the local parade and some door to door begging for a tootsie roll. lol!
So, I made these for the girls - hopefully they are DIVAish enough :)
The purse was made of the top note die and the scallop oval frame die and the big shot. The designer series paper is retired- I forget what the name of it is off the top of my head. I also used the big shot and the sans serif alphabet dies to make their purses monogrammed. :) It is hard to see in the picture, but the letters are outlined with black glitter. Gotta start them out early, right ??? hehehe!!
We are going to see my daughter's step cousins tonight,so I wanted to make them a treat bag too. More retirees here, but there are some fun new things also.
The bag itself is made from the fancy favor box die and the big shot. The skull stamp (just jawing) is also retired, but I still love it.... :) But, here are some fun things I did to the skulls:
I used dazzling diamonds on both skull's eyes....but this one I used the smooch accent ink to give him a gold tooth. Hae you ever seen The Bee Movie??? One of my favorite lines of it is when Barry Benson ( the main bee in the movie) says "I think I'll get a gold tooth and everybody can start callin' me dawg." Guess you ahd to be (or BEE) there - but I can't get that quote out of my head since I made this.....argh!!
And this little cutie has a "pearl" tooth - I used the illuminate top coat smooch accent ink on this one. Can you see it in the picture????
Labels:
3 dimensional,
big shot,
fall,
gifts,
halloween
Wednesday, October 13, 2010
Need a reason to stamp????
REALLY?????
You need a reason?
sad, sad, sad........you failed that test!
Stick with me here - I am not a night person and it is 11:30 PM and I am sitting here making you a post to look at.....I am not trying to make you feel guilty or anything, but you better not need a reason next time.....just do it :)
You know what?? I am not really a mornign person either and a nap is always desired mid afternoon.....
humph. well - let's move on, shall we??
I still have soooooo mony pictures to share with you from my Regional trip to Baltimore. And you know I {luv} fall - so I have some more samples made with the Day of Gratitude set in the Holiday mini.
Wanna see?
pretty, huh.......thank you to who ever made these sample cards.....
You need a reason?
sad, sad, sad........you failed that test!
Stick with me here - I am not a night person and it is 11:30 PM and I am sitting here making you a post to look at.....I am not trying to make you feel guilty or anything, but you better not need a reason next time.....just do it :)
You know what?? I am not really a mornign person either and a nap is always desired mid afternoon.....
humph. well - let's move on, shall we??
I still have soooooo mony pictures to share with you from my Regional trip to Baltimore. And you know I {luv} fall - so I have some more samples made with the Day of Gratitude set in the Holiday mini.
Wanna see?
pretty, huh.......thank you to who ever made these sample cards.....
Labels:
cards,
fall,
stampin up events
Monday, October 11, 2010
Fall Goodness
HI Stampers!!
I just {luv} fall - don't you?? yum.
Are you missing your eye candy samples from the Regional event that I attended in Baltimore?? I have soem more to share with you today......
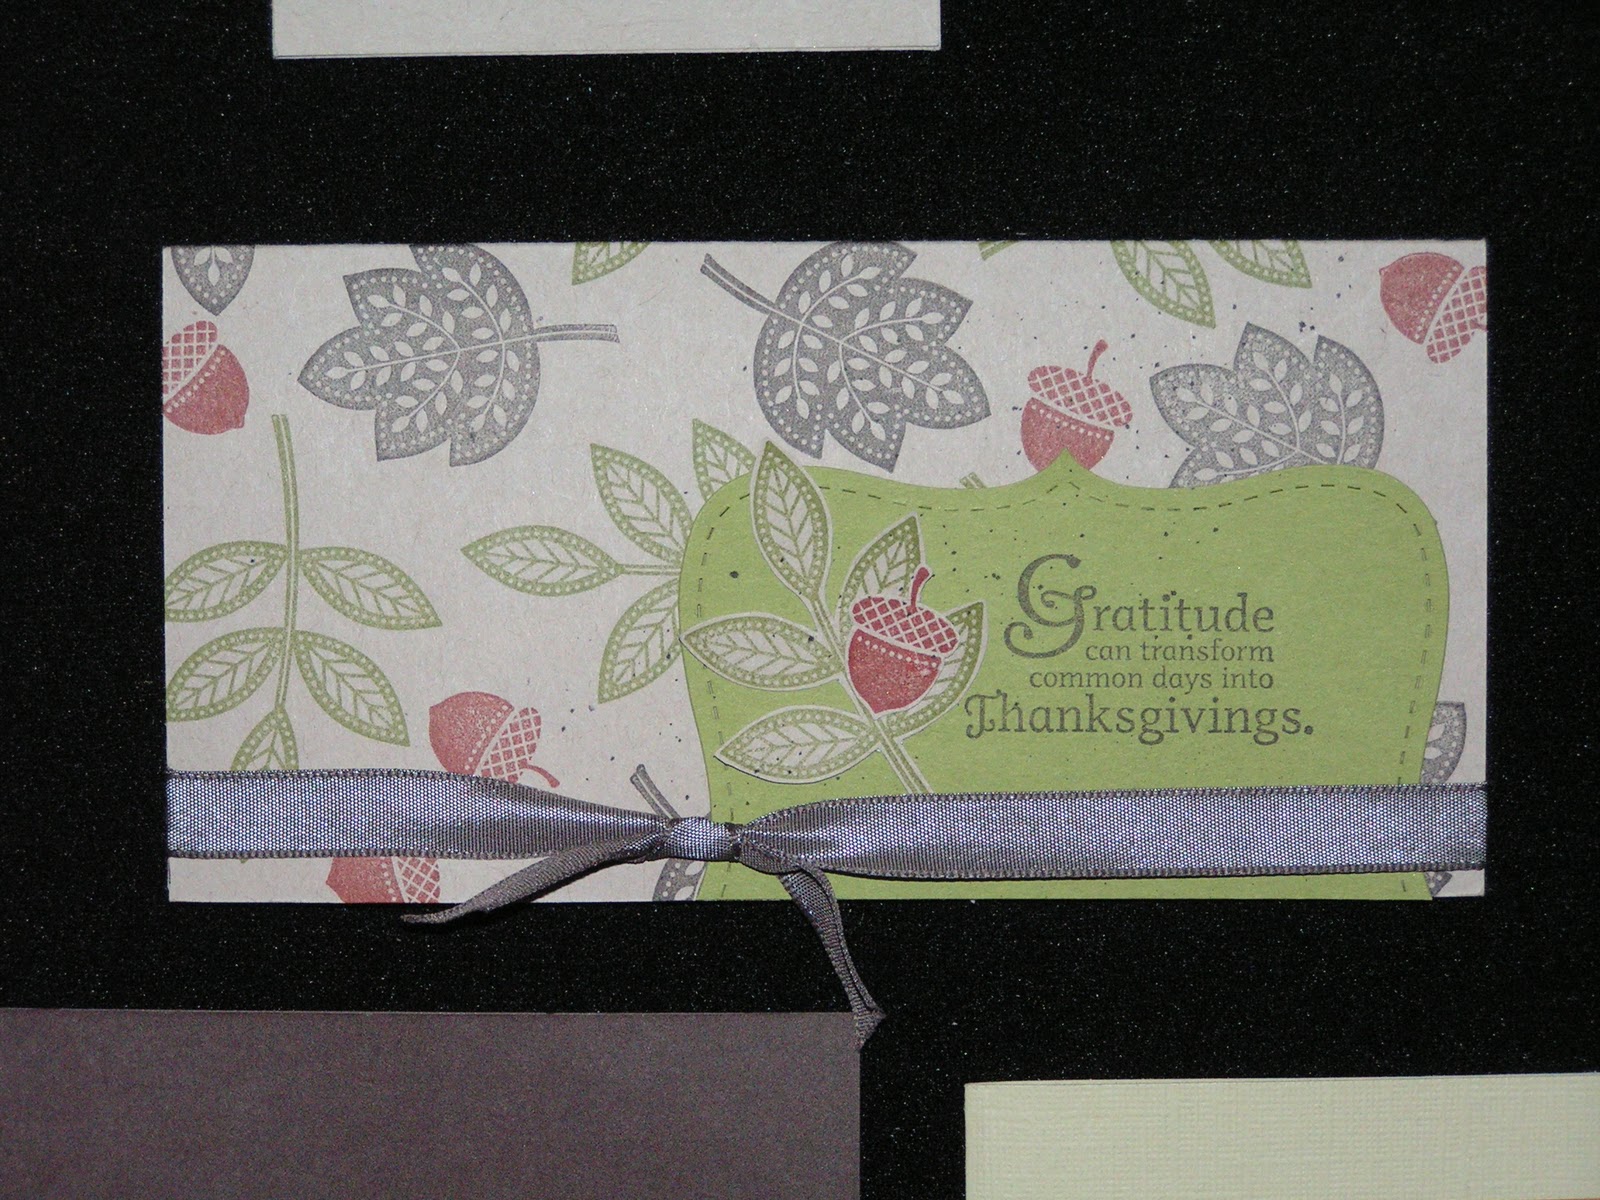
Like I said before, I don't have access to the creators of the cards off of the sample boards - so if one of these are your creations, please let me know and I will edit my posts.
Now - get to stampin'! :)
I just {luv} fall - don't you?? yum.
Are you missing your eye candy samples from the Regional event that I attended in Baltimore?? I have soem more to share with you today......
Like I said before, I don't have access to the creators of the cards off of the sample boards - so if one of these are your creations, please let me know and I will edit my posts.
Now - get to stampin'! :)
Labels:
cards,
fall,
stampin up events
Friday, October 8, 2010
We interupt this regular broadcast
.....for station identification!
I have been showing you so many things that I haven't made, I felt it was time to let out something that was mine :)
Get it? Station Identification???
Blog identification????
Identification?????
me???
No? Not as funny as I thought it might be.......lol!
My daughter is in swiming lessons. Poor thing - My hubby and I (mostly me) have been spending her whole life making her afraid to be around any water other than the bath tub - and that even has strict rules......I know - I need to loosen up.....and we take her to swimming lessons and expect her to be willing to do what ever they want her to do. Her first session, this summer, went ok. She had to be pulled off the wall to do everything and by the time her instructor had her half way across the pool, she did enjoy herself....but getting to that point wasn't very easy. This session ended last night and her instructor has been really awesome with her. All of the instructors are SRU students and this group we have this session are all so good with the kids. You can tell they enjoy being around the kids, not just there to get paid to make sure kids stay above water....ya know what I mean? So anyway - her next session starts next week so as far as my daughter is concerned....it will be life as normal - except she may not have the same instructor.......I sure hope she does.
Boy - I went off the deep end there, huh? LOL!!! Get it??? Deep End??? Deep end - swimming - deep end???? LOL!! I kill myself - and i didn't even mean to say that until it was already typed out......
So anyway - I wanted to give her instructor a "little something" for all of the extra attention she has given to my daughter. Every girl likes chocolate, right?? Well - everygirl should...... lol!
I decide to see what I had in my stash of stashes and see if I had anything I could decorate and put some chocolate in. I had a "few" {**wink**} things that I could put chocoalte in and decorate......So I decided to go with a small basket. And then I ran with it. Well, walked with it.....I am not much of a runner - hehehee!!!! Wanna see?
Isn't it darling? Seriously - isn't it? I cut felt leaves out with the leaves 2 die and my big shot....oh how I {luv} him...the big shot!! Who did you think I was talking about??? Come on ladies - what is not to
[luv}? I then took a piece of the black strtiped wide grosgrain ribbon and cut it in half lengthwise and then cut the finished edge off of one side. Then - here is where the fun started - PULL THE EDGE PIECES OUT.......oh - how fun!! This created a frayed edge and when I tied my bow it pulled more threads out making it look a little shabby. I then pullede out Fabulous Phrases and stamped the word "enjoy" onto apiece of confetti cream cardstopck that I had already stamped a leaf from Autumn Spendor in old olive onto. I ocmpleted it with the jewelry tag punch and punched a hole in the tag with my paper piercer and added it to the bow with a pin from the vintage trinkets, {yum} see?
cute, huh? (boy, I am full of myself today, huh?)
A bag of store bought chocolate would look so tacky in here, right? So, for pennies - I mean p.e.n.n.i.e.s. - i dumped it into a large flat cello bag and tied it with a piece of scrap ribbon fromt he basket and made a little "thank you" tag to hang on it. The sentiment is from Curly and Cute. I stamped it in early espresso onto confetti cream and then stamped off an old olive leaf from Autumn Spendor before punching it with the new extra large dcorative label punch. I adorned it with two acorns stamped from Autumn Splendor mounted up on stampin' dimensionlas before tying onto the ribbon with twine.
So, I created this gift in a jiffy with my Stampin' Up! supplies I had on hand to make a bag of candy really look "wow."
What do you think?
I have been showing you so many things that I haven't made, I felt it was time to let out something that was mine :)
Get it? Station Identification???
Blog identification????
Identification?????
me???
No? Not as funny as I thought it might be.......lol!
My daughter is in swiming lessons. Poor thing - My hubby and I (mostly me) have been spending her whole life making her afraid to be around any water other than the bath tub - and that even has strict rules......I know - I need to loosen up.....and we take her to swimming lessons and expect her to be willing to do what ever they want her to do. Her first session, this summer, went ok. She had to be pulled off the wall to do everything and by the time her instructor had her half way across the pool, she did enjoy herself....but getting to that point wasn't very easy. This session ended last night and her instructor has been really awesome with her. All of the instructors are SRU students and this group we have this session are all so good with the kids. You can tell they enjoy being around the kids, not just there to get paid to make sure kids stay above water....ya know what I mean? So anyway - her next session starts next week so as far as my daughter is concerned....it will be life as normal - except she may not have the same instructor.......I sure hope she does.
Boy - I went off the deep end there, huh? LOL!!! Get it??? Deep End??? Deep end - swimming - deep end???? LOL!! I kill myself - and i didn't even mean to say that until it was already typed out......
So anyway - I wanted to give her instructor a "little something" for all of the extra attention she has given to my daughter. Every girl likes chocolate, right?? Well - everygirl should...... lol!
I decide to see what I had in my stash of stashes and see if I had anything I could decorate and put some chocolate in. I had a "few" {**wink**} things that I could put chocoalte in and decorate......So I decided to go with a small basket. And then I ran with it. Well, walked with it.....I am not much of a runner - hehehee!!!! Wanna see?
Isn't it darling? Seriously - isn't it? I cut felt leaves out with the leaves 2 die and my big shot....oh how I {luv} him...the big shot!! Who did you think I was talking about??? Come on ladies - what is not to
[luv}? I then took a piece of the black strtiped wide grosgrain ribbon and cut it in half lengthwise and then cut the finished edge off of one side. Then - here is where the fun started - PULL THE EDGE PIECES OUT.......oh - how fun!! This created a frayed edge and when I tied my bow it pulled more threads out making it look a little shabby. I then pullede out Fabulous Phrases and stamped the word "enjoy" onto apiece of confetti cream cardstopck that I had already stamped a leaf from Autumn Spendor in old olive onto. I ocmpleted it with the jewelry tag punch and punched a hole in the tag with my paper piercer and added it to the bow with a pin from the vintage trinkets, {yum} see?
cute, huh? (boy, I am full of myself today, huh?)
A bag of store bought chocolate would look so tacky in here, right? So, for pennies - I mean p.e.n.n.i.e.s. - i dumped it into a large flat cello bag and tied it with a piece of scrap ribbon fromt he basket and made a little "thank you" tag to hang on it. The sentiment is from Curly and Cute. I stamped it in early espresso onto confetti cream and then stamped off an old olive leaf from Autumn Spendor before punching it with the new extra large dcorative label punch. I adorned it with two acorns stamped from Autumn Splendor mounted up on stampin' dimensionlas before tying onto the ribbon with twine.
So, I created this gift in a jiffy with my Stampin' Up! supplies I had on hand to make a bag of candy really look "wow."
What do you think?
Wednesday, October 21, 2009
It's the most wonderful time of the year.....
I absolutely love fall weather and today in western PA, we are having one beautiful, delightful day! So, I stepped back from Christmas stuff I have been working on to make a fall card.


Wanna see?
go-jus, huh?
I used the exclusive two tags die for the main panel. I stamped the image from Wandering Words in the Holiday Mini Catalog. Who couldn't put those stamps to great use??? I inked it up with close to cocoa and inked the leaves with stampin write markers in tempting turquoise, more mustard and dusty durango. I then sponged the edges with close to cocoa and chocolate chip. The designer series paper is from the Holiday Mini also, it is Autumn Meadows, which in my opinion is the most beautiful fall paper Stampin Up has ever had. It is just gorgeous!!! The card base is tempting turquoise that I sponged with close to cocoa. The leaves are cut with the big shot and the leaves #2 die. I then textured them up with texture plates #4 and perfect details texture plate through my big shot. They were sponged and curled up.
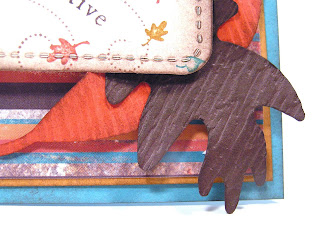
Here is a close look at the leaves:
Now, I don't want you to misunderstand just how much dimension is on this card....
So...what do you think?? Leave me some love with your first thoughts of this baby.
Well....off to pick up the little one from school and keep her away from the hubby which has been home all week sick. I had him to the ER and sure enough he has flu and walking pneumonia....argh!!! I just hope my little one does not get it!
Labels:
big shot,
cards,
challenges,
fall,
thanksgiving
Friday, September 11, 2009
I'm Falling For You
HI Stampers!!!
Today is the second day of the RemARKable Holiday Tour!!! Did you enjoy the ride yesterday???
The card base is dusty durango. I cut it at 5 1/2 x 8 1/2. Along the 8 1/2 side score in at 2 1/8 on both ends. I stamped the entire outside of the card with the 5 petal leaf in dusty durango randomly. I then randomly stamped the acorns in close to cocoa. I sponged all of the edges in close to cocoa to "dirty" it up a bit. :)

Today is the second day of the RemARKable Holiday Tour!!! Did you enjoy the ride yesterday???Today, I have a gate fold card that uses the new Autumn Splendor. I think these leaves are absolutely gorgeous!!!!
For my main image panel I stamped the oak leaf and the maple leaf onto scraps of very vanilla card stock with close to cocoa craft ink and embossed them with clear embossing powder and my heat tool. After they cool for a few seconds, I sponged color all over them. The colors I used were crushed curry, tempting turquoise, dusty durango and close to cocoa. I then cut them out and adhered them to my main image panel that had been stamped with my sentiment from teeny tiny wishes. I matted that onto chocolate chip.
Here is a closer look at those leaves:
Now....here is the important part!!!!! Only put adhesive on HALF of the panel before adhering it to the card front.
Leave me some love here in the comment section and then head right over to Becky's place and see what she cooked up for today.
I'll see you tomorrow for day three of the tour :)
Labels:
blog tour,
card folds,
cards,
fall,
thanksgiving,
tutorials
Thursday, September 10, 2009
A Patch of Smiles
HI everyone!!!

I don't even know where to begin....I had so much fun making this card!!! The card base is rich razzleberry. The black background panel is embossed with the big shot using the perfect details embossing plate. Here is a closer look, I'm not sure how well it photographed. argh!!

It is day One of the RemARKable Holiday Tour!!! We will all be show casing some awesome products from the Holiday Mini - Isn't it A.W.E.S.O.M.E.????? This is the best mini I have ever seen....but it isn't too mini with it's 40 pages!!! Holiday Medium sounds kind of silly though....so Mini it is! You should have come here from Deanna's Blog....but if you didn't, don't worry. Just follow along to the end and link up the beginning blog and make your route.
Here is my piece of goodness for the day:
The multicolored panel is a piece of designer series paper from the Holiday Mini, Night and Day. The entire package is black and white, so I sponged rich razzleberry, pumpkin pie, and old olive with stampin' sponges. Instant coordinating designer series paper - does it get any better then that??? I don't think so, my dear stampers :)
The main image panel is whisper white. All of the stamps on this card are from Pumpkin Patch. I stamped the two oval pumpkins directly on the front and the round one in the middle was stamped onto scrap card stock. I embossed all of the faces on the pumpkins with basic black craft ink and irredescent ice embossing powder. {luv} it! I then stamped the grass along the bottom. I then sponged the grass with old olive and the sky with pumpkin pie and rich razzleberry. The stems and curlies were also stamped with old olive. I punched the circle pumpkin with the 1 inch circle punch and adhered it down with stampin' dimensionals. That layer was matted with rich razzleberry. I punched the right hand side of the panel with the horizontal slot punch to run some rich razzleberry polka dotted grosgrain ribbon that had been turned over to cover the dots through. I then folded it back and adhered an orange rhinestone brad, from round fire rhinestone brads, through and adhered it to the front of the card.
I stamped my sentiment in rich razzleberry and sponged the ends lightly before punching it with the modern label punch.
Don't forget to come back tomorrow - There will be more "touring" going on.
Before you leave, leave me a comment letting me know what you think. And then click on over to Becky's Blog for you next stop on the tour.
Friday, July 31, 2009
A fine day to be a pheasant
HI all!
Today is Blogger's Challenge day and it is a sketch challenge.
Here is what I came up with...I haven't stamped in two weeks, really - so my mojo is definitely not flowing.....I think we are back to semi-normal now so maybe I can get myself back in the swing of things :)
One thing I did change about the sketch was the sentiment placement. It was supposed to be on the lower panel, but I put it under the pheasant instead.
recipe:
stamps: woodgrain background, autumn days, teeny tiny sentiments
cards tock: kraft, very vanilla, soft suede, bermuda bay
ink: soft suede, bermuda bay, chocolate chip and bravo burgundy stampin' write markers
accessories: 5/8" vanilla grosgrain, latte buttons, playground buttons, stampin' dimensionals
I sure could use some love this week.....let me know what you think.
Labels:
bloggers challenge,
cards,
challenges,
fall,
masculine,
thanksgiving
Thursday, June 18, 2009
I am falling in love......
....with the new in colors. I will so much miss the ones this year...I love each and every one of them also!!! Here is what is coming up on July 1st:


As a demonstrator, we are able to preorder a handful of stamp sets and accessories out of the upcoming catalog. If you are interested in being a demonstrator, I would love for you to be part of my team...be sure to contact me ( regcorn@zoominternet.net )
I ordered almost everything we were able to order....hehehehehe!!! I set I was immediately drawn to was autumn days. I got to play with it a little bit today! whooohoooo!!!!
The card base is really rust, it is stamped with a small maple leaf stamp that is part of autumn days. Every stamp of the card is from autumn days except the sentiment. The brown panel is a new in color - soft suede....love it!!! The yellowish panel is crushed curry. I embossed the wheat in clear embossing powder and then sponged all over it with crushed curry and soft suede on the edges. Both of those panels are distressed with the tool kit.
Oh, did you happen to see the sentiment? It is from teeny tiny wishes...a new, large set of sentiments that are all in a small font - punch friendly - LOVE THAT!!!!! Oh a new punch???? Oh yes.....that is the new modern label punch. I accented it with a few vintage brads.
The pheasant was inked with a combination of ink pad and stampin write markers. I will "own" this pheasant with more practice....I don't quite "own" it yet, in my opinion...but I will, soon! I want him to look realistic.....i will get there. :)
Anyway, check out the dimension that the distressing and dimensionals give.
What do you think? It is my first stab at this new set....I hope I did it justice :o)
Labels:
cards,
fall,
masculine,
sneak peeks
Subscribe to:
Posts (Atom)