Wednesday, October 28, 2009

Home Dec In A Sec Kit!!!!

HI everyone!!

I'm sorry it has been a while....I have been working on things...but I just can't share them right now. ;)


I an offering a Home Dec in a Sec Kit. If enough local gals are interested and would like to hold a class to put these together, I would be happy to offer that for the kit price as well.

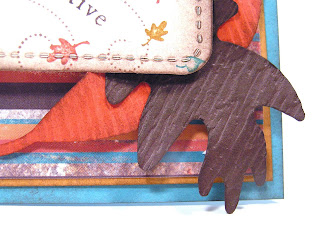
Isn't this absolutely adorable, if I may say so myself?????
Enlarge the picture to see in more detail.
This will make an excellent gift for teachers, neighbors, co-workers, friends, coaches!!
I know two preschool teachers and a dance instructor that will be getting one ;)

Your kit will include everything precut to assemble your chipboard tiles and all the accessories to finish it. All you will need to provide is your adhesive (sticky strip recommended) and stampin dimensionals. The designer series paper may vary from the picture, but all designer series paper will be from either Merry Moments or Christmas Jingle.


The cost of the kit is only $16 plus shipping, if it applies.


As per Stampin' Up! rules, I am not able to provide any stamped images in kits. I will provide card stock to stamp images similar to mine here though. If I hold any classes with these kits, we will use my stamps to make it exactly like this one.

Wednesday, October 21, 2009

It's the most wonderful time of the year.....

I absolutely love fall weather and today in western PA, we are having one beautiful, delightful day! So, I stepped back from Christmas stuff I have been working on to make a fall card.

Wanna see?


go-jus, huh?

I used the exclusive two tags die for the main panel. I stamped the image from Wandering Words in the Holiday Mini Catalog. Who couldn't put those stamps to great use??? I inked it up with close to cocoa and inked the leaves with stampin write markers in tempting turquoise, more mustard and dusty durango. I then sponged the edges with close to cocoa and chocolate chip. The designer series paper is from the Holiday Mini also, it is Autumn Meadows, which in my opinion is the most beautiful fall paper Stampin Up has ever had. It is just gorgeous!!! The card base is tempting turquoise that I sponged with close to cocoa. The leaves are cut with the big shot and the leaves #2 die. I then textured them up with texture plates #4 and perfect details texture plate through my big shot. They were sponged and curled up.


Here is a close look at the leaves:


Now, I don't want you to misunderstand just how much dimension is on this card....


So...what do you think?? Leave me some love with your first thoughts of this baby.


Well....off to pick up the little one from school and keep her away from the hubby which has been home all week sick. I had him to the ER and sure enough he has flu and walking pneumonia....argh!!! I just hope my little one does not get it!

Thursday, October 15, 2009

I am a sparkly dirty girl....and I have a TUTORIAL for you!!!!

HI Stampers!

I know it seems like I fell off the face of the blogosphere...but I haven't, really :) I am getting ready for the Christmas Card Stamp Camp among other things ;)

I have to be super quick today.....but I do have a tutorial.

I am going to show you how to use your shimmer paint from the Holiday Mini Catalog and make your own shimmer mist. Trust me.....when you use it once, you will be shimmering everything....I mean everything!!

Here are the supplies you need:
rubbing alcohol, small fine mist spray bottle, and shimmer paint.
Shake up your shimmer paint. Take an empty fine mist spray bottle and pour a little bit in.


Fill the rest of the way with rubbing alcohol....and shake....shake some more...keep shaking.... :)


Here is a card I made this morning with my shimmer spray:


It's hard to see any shimmer in the picture, but here is a closer look at some shimmer goodness:I even stamped the inside today:
Sorry....I can't go into extreme detail this morning - have to get the little one from school very soon - but I wanted to give you the shimmer spray tutorial.
It would make my day if you left some love here in the comment section....let me know what you think of the shimmer spray idea :)


Wednesday, October 7, 2009

Embrace me

....My sweet embraceable you....

HI Stampers!!

Here I am, on Wednesday mind you, with a Mojo Monday Sketch. One of these days, I will get together. Maybe in January! LOL!!! Anyway, here is the sketch this week.

It's a beauty, huh? I will use this one over and over, I'm sure! As a matter of fact. maybe I will see what else I can get done with it this week :)

Here is my take on it:


October is National Breast Cancer Awareness Month - so I thought I would do a predominantly pink card. How did I do?


The card base is melon mambo. Do you like the designer series paper? Doesn't it coordinate with my color combo so well??? It started out black and white - Yep! it's the night and day designer series paper from the Holiday Mini. I altered it by using sponge dauber and pretty in pink, regal rose and melon mambo ink to shade in the flower design. I think this is the most versatile paper Stampin' Up sells because it cam be any color you want it to be :) Anyway....I matted that with whisper white. The vertical panels are also from night and day. I tied a bow with the white satin ribbon. It is so smooth I wanna take a bath in it.....no kidding! Of course, my dry skin would snag it all up! lol!!

I also placed three black brads with white "washers" on the top or bottom of the vertical panels. I used my circle scissor plus to cut the main circle panel as well as the regal rose mat. I used the stamp a ma jig to stamp my sentiment. I also stamped the branch from embrace life on the white circle as well....there is a little bit of it peeking out by the flowers.

Ahhh.....the flowers. This is where my whole card began. I absolutely love the flowers from embrace life!! I stamped them with jet black staz on ink and then colored them up with sponge daubers like the background designer series paper. I also accented the stamens with my white gel pen. Adhered the flowers down....the top one with stampin' dimensionals.


Here is a close up shot that lets you see some flower, background paper, brads and "washers" and some of that heavenly ribbon!!


I would really love for you to leave me a comment here letting me know what your first thought was when you saw this card. :)

Monday, October 5, 2009

Flutter up the Cottage Wall

Yeah.....you heard me right...lol!

I made this scrapbook page last week - when I should have been cleaning ;) Keep it our little secret and no one gets hurt!

I vowed to myself that I wasn't going to get so behind on my daughter's scrapbook this year if it meant that I would scrapbook out of chronological order.....gasp!!! Well....I can not bring myself to scrap dates here and there.....so here I am still showing you Easter stuff for scrapbooking....please forgive me!! {please}

Here is the two page spread:

The designer series is from Cottage Wall. The butterflies are cut with my big shot and the exclusive butterfly die from Stampin' Up!.

Here is the left page:


A few little details about this side....The title was stamped with my jumble alphabet in pale plum. "The Big" was stamped with the calendar alphabet and number set in certainly celery. The subtitle "Good Times" is from fundamental phrases and I stamped it repeatedly with my stamp a ma jig in rich razzleberry. I put little circles in between the phrases with my old olive stampin' write marker.


Also, I wanted to do a little ribbon detail around the photo mat of the vertical picture. I wrapped the rich razzleberry polka dot grosgrain ribbon around it and instead of knotting it I secured it with a pewter build a brad. See that little butterfly??? That was punched out of the designer series paper as well - it pays to save scraps :) I adhered that with a mini glue dot and then put the clear bubble sticker over it. Cute as pie, huh?


Here is the right hand side page:


Boy oh boy....I'm glad to have another page done! :)


I would love for you to leave me a comment telling me what you think.

Thursday, October 1, 2009

Bling it on, Rudolf!!!

Hello stampers!!!!

I have a card to show you real quick today....I fell in love with the dasher stamp in the Idea Book and Catalog. What an awesome single stamp!!! So here is what I did with him.

The card base is old olive. The designer series paper is from the Christmas Jingle Simply Scrappin' kit. The top background is textured real red card stock. See that ribbon like thingy that connects the two panels where they meet???? That is a self adhesive strip from the scrappin' kit. It was 12 inches long in the package, so it could have been a border for a 12 inch scrap book page...but I used it here for a little faux ribbon action. That whole panel is matted with chocolate chip and adhered to the card base. My sentiment is from fundamental phrases. I punched it out with the modern label punch and snipped the one end off. Dasher was inked with close to cocoa ink and then I tapped his edges with a sponge dauber with chocolate chip ink. I matted him with chocolate chip. I blinged up his antlers and his nose...but we will get to that :)


The snowflake was punched out with the snowflake punch - obvious, huh?....I clearly didn't punch it with the butterfly punch....LOL!!! Sorry, I had to get some sarcasm in today.... ;)


I blinged it up with a two way glue pen and dazzling diamonds. I layered it onto a 1 3/4 inch circle punch of old olive. I adhered those two together with a red rhinestone brad from the fire round rhinestone brads.

Bling!! BLing, Bling!! Bling!! Bling!! I couldn't stop!


Here is a closer look at 'ol rudy.....


I covered his antlers with dazzling diamonds and a two way glue pen. Couldn't stop there, though! I put a small dot of tombo mono multi glue on his nose and added a red bead from the red bead duo.


Well....there he is, in all of his handsomeness.