Tuesday, May 31, 2011

My Sweet Peach Parfait.......

Hi All!  Did you miss me?  I sure have missed you!!!  I have been feverishly cleaning - I am on a throw out mission......our garbage collector probably isn't too happy with me.....oh well.  ;)

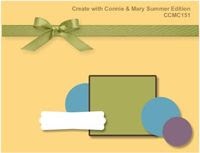
I have finally taken the time to complete my Create with Connie and Mary Challenge this week....just under the wire....lol.  This week was a color challenge - yummo.


Riding hood red was my absolute favorite red back when it was an in color - but I reach for cherry cobbler all of the time now.....so it was real nice getting the "hood" out this week.  hehehehe..... 

Wanna see what I came up with?  Well - of course you do...that's why you are here, huh?


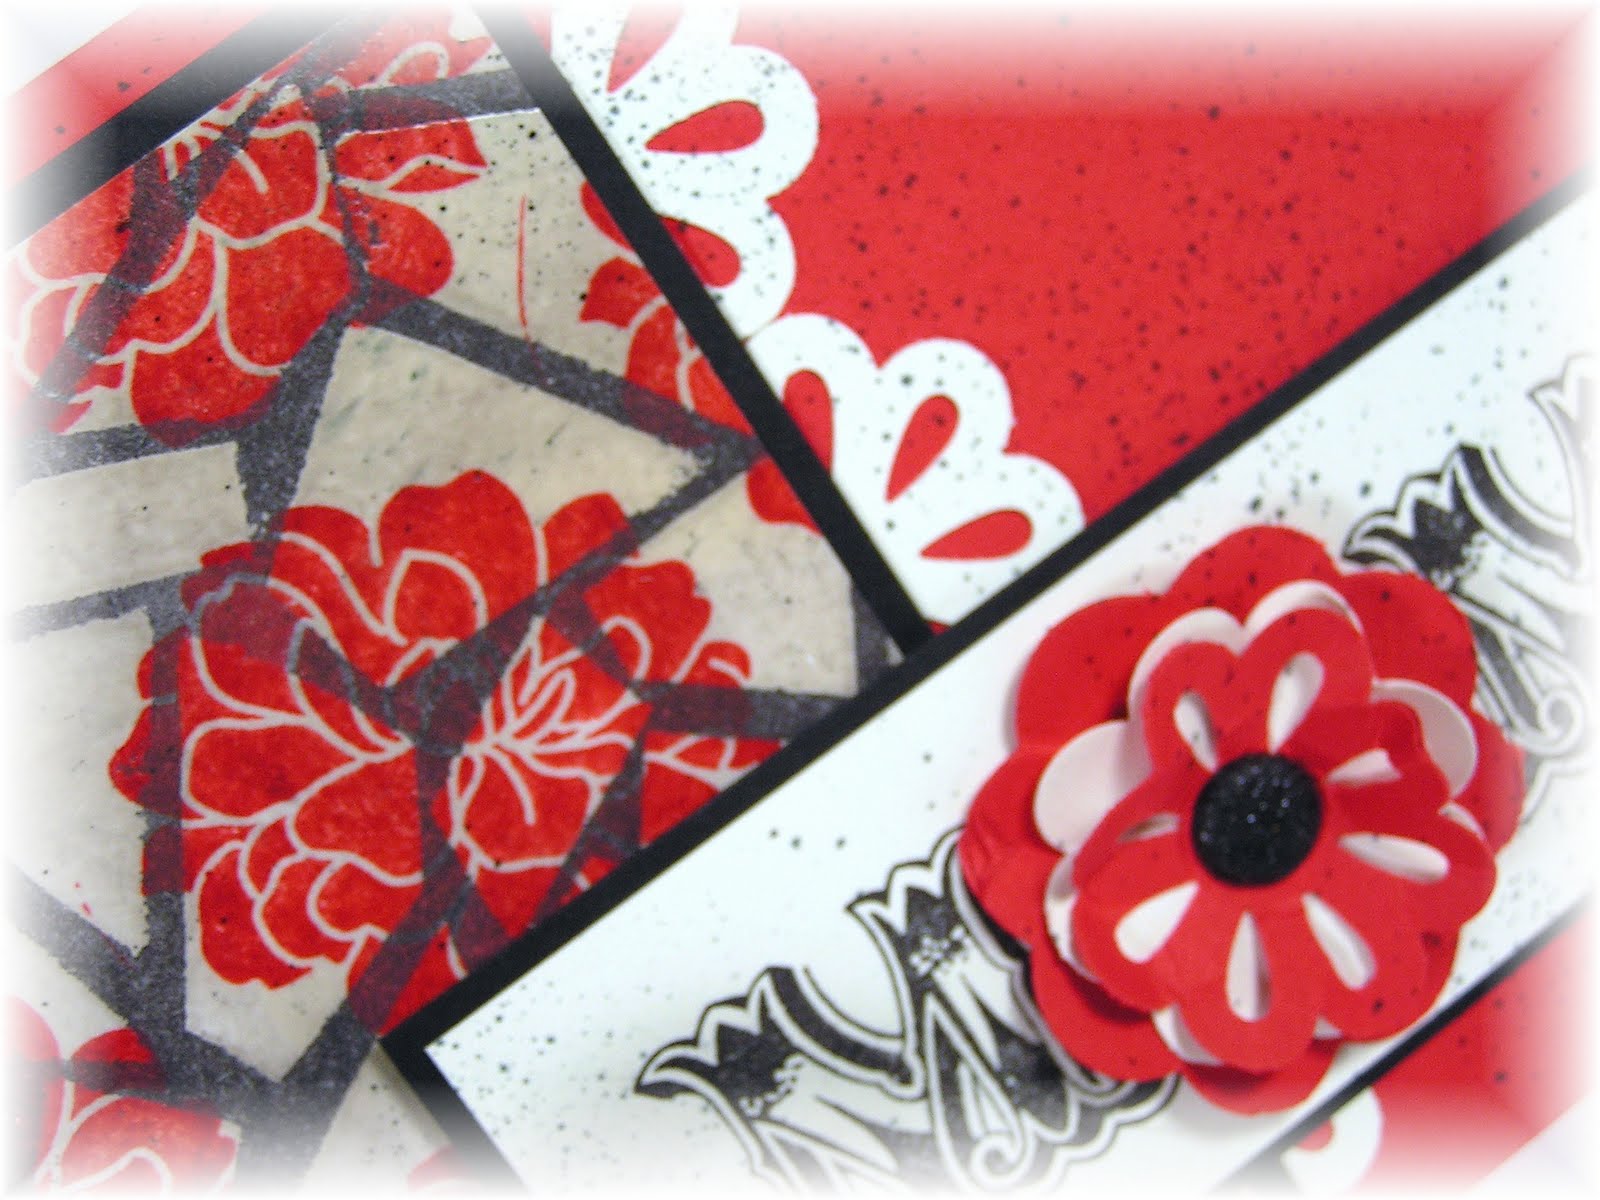
Well - you like?  I pulled out this set because I was thinking - of all the sets I own in the current catalog - which would have been easier to say "of all the sets I do not own....." (but that is another story.....) which set would I feel really bad if ti were on the retired list?????  Fifth Avenue Floral - hands down.  I have used this set for so many different techniques.....and I {luv} to watercolor.....so That is why I pulled out this beauty this week.  I thought that peach parfait combined with riding hood red would blend well together for water coloring this rose - did I do my idea justice?  I hope so.  I stamped the rose and the lily (?) onto watercolor paper with black staz on ink. I water colored the rose with peach parfait and riding hood red and the lily with pear pizzazz and old olive - sorry to sneak some green in on the challenge - I just  thought the flower needed that extra "pop."  lol.

I accented the corners of the rose background panel with the basic pearl accents - how sweet is that tiny detail???  I then matted that with riding hood red.  Take a closer peek:


The card base is baha blue.  I cut two strips of very vanilla and embossed them with the big shot and the coordinating manhattan flower embossing folder.  I put those two panels onto a piece of very vanilla before adhering it to the card base.

The sentiment is stamped with black staz on also.  I folded the strip to resemble a banner.  The entire card is sponged with crumb cake.  I also did up the inside:


Well - I would love to know how you feel about this little creation of mine.  Don't forget that the RETIREMENT LIST comes out tomorrow - I can't believe it!!!!
Have a great day!

Monday, May 30, 2011

Happy Memorial Day

I wanted to hop on here and say thank you to all who have served for our country and all of the families who have sacrificed for our safety.......thank you.


Also - I wanted to mention that the RETIREMENT LIST comes out in two days - June 1st.  I can't believe we are so close to a new catalog!!!!!

Tuesday, May 24, 2011

Step into my Enchanted Gardens

HI All!!

I have a little scrapbook layout to share with you today.  I am working at getting our Disney trip all done......and we went to Disney World last May.....argh!!!   I am so far behind, I really thought I was in first place.....really.  Any way....I did a layout last week for some of the beautiful topiaries that were in Epcot.   They really do amazing stuff with food and shrubs.  awesome.

Here is what I came up with:


Life size princesses and princes......astounding.
Let's get to the dirt.......lol.  I wanted to use floral paper that had pink tones in it.....so I pulled out Fabulous Florettes and made my own!!  The flowers are stamped onto whisper white card stock and then I felt it lacked depth.....so I sponged the flower centers with daffodil delight ink......still a little "off" to me......so I pulled out my spritzer tool and regal rose stampin write marker and went to town.  :D  And I couldn't resist using the triple layer flower punch for a border.....again.  :)  Doesn't it make the sweetest border??  I think so.  And then to ground it to my background page, I added a strip of always artichoke designer series paper from the regals pack.  Take a closer look:


I cut the title with my big shot and the timeless type alphabet sizzlets.  yummo.....  And to give them a little depth, I accented highlight marks with a stampin' write marker.  And I ha to cut some flowers out for accents.  see?


That is the greatest thing about stamping your papers and accents......you can have perfectly coordinated pieces to match your "designer series paper."  Well - how did I do?  I would love to hear your feedback.

Sunday, May 22, 2011

grunge rock, baby

Well.....wouldn't you know????? 

I was working on a card for the Create with Connie and Mary challenge this week - a sketch challenge......and I also won a subscription to the Create with Connie and Mary Summer Edition - GREAT ideas on there....by the way  :).......and they host a challenge for all subscribers on Saturdays....it was a color challenge.  KNOW WHAT????  The colors I was working with were the same exact colors that were in the Summer Edition challenge!!!!  It was meant to be.....inky fate, so to say ;) 

Wanna see both challenges??


Sweet on both, huh?  I bet you are wondering where I went with those......Well - even if you aren't - I will still show you - lol!!!


One thing to note - the color challenge said we could add any neutrals - I added crumb cake and basic black.  I challenged myself not to use whisper white or very vanilla.....how did I do?  The card base is basic grey - I think it looks a little bluish here - but trust me, it is grey....hehe

I did take the creative liberty of enlarging the main image panel of the sketch - please don't stone me for it.....I really wanted to use a combination of Extreme Elements and Grunge Rock - which is on sale this month.  I think Grunge Rock is essential if you make teen cards - or if you make any cards for people that are in video game rock bands ;)  And at the sale price - who could resist????

Take a closer look at the dirtiness of those panels and all of the layering of stamps.


I would love to know what you think of my grunge rock, baby.
Have a great day!

Thursday, May 19, 2011

I was in the top 3!!

whoooohooooo......Create with Connie and Mary chose my card as one of their top 3 picks from last week's color challenge.  scroll down for the post , if you missed it :)


Wednesday, May 18, 2011

My dear friend.....

Hi stampers!  Did you miss me??  I missed you!  I have been doing some things behind the scenes, so to speak :)  Not a lot to post here, unfortunately.  But I did get to create some goodness for the Create with Connie and Mary challenge this week.......  {smile}  This week was a color challenge....wanna see?


Have you ever sat down to do something....and had a stamp set in mind that you were going to use.....I mean wanted to use - no mind changing....just dying to ink up??????  Well I had that this week.  I was going to use Flower Fest......I love this set and haven't had a chance to give ti any love.....even though the colors kept pulling me towards the new nautical stuff......i mean pulling.  But I really wanted to use Flower Fest.  really.  So Here is what I came up with:


I sure hope the fact that I used old olive leaves doesn't get me banned from the challenge- I just couldn't make it work for this card without them.   Did you get a close look at those flowers and that ribbon????  Oh - the ribbon.............Let me tell you - I will be making more of this type of ribbon in the future........  Here - look closer:


ooooo....did you see that cajun craze wrinkled seam binding ribbon?  I know, Stampin' Up! doesn't carry that in their catalog...or in the mini catalog.....I made it out of very vanilla seam binding ribbon.  OH HOW YUMMY!!!  It was easy peasy lemon squeezy! 


Wanna know how to do it?


I want you to be warned.......If I tell you how to do it.......You can't blame me for the impulses you will have to do it on your own.  If you can't resist peer pressure -I suggest you stop reading this right now.

All I did was I took a length of very vanilla seam binding ribbon and colored it with my cajun craze marker.  I suppose you could have dyed it with reinker and a cup of water......but I couldn't be bothered with all of that extra time.  {{lol}}  After I had it colored with the marker.....I placed it on an old towel and sprayed it with water.  I used a spray bottle that sprays similarly to the stamp cleaner spray bottle.  Next I balled it up in the towel to get the excess water and ink color off and then waded it up into a paper towel to dry over night.  Now - here is the IMPORTANT part.....don't mistake your wads of paper towels for garbage - that would be a sad, sad day........

Well - there you have it - total stampin' pressure to go create some wrinkled seam binding ribbon for yourself.  Just don't say I didn't warn you ;)

Wednesday, May 11, 2011

You are SNOW CUTE!!!!

HI all! 

This layout is a bitter sweet reminder of our winter this past year.  My hubby fell out of his truck before thanksgiving and ended up with surgery and a winter off and totally out of commission.  It was a long winter here in western Pa......a long - cold - snowy winter.  And my little one loves to play in the snow - but that is daddy's thing.  I don't do cold physically well at all.....I mean at. all.  So, needless to say - our daughter really suffered in the playing in the snow department.....and she really likes it.  So - this day the winter moons finally aligned.   lol!!  It was finally warm enough when we had snow when it wasn't windy......you know all of the normal winter stuff finally took a break, so to say.  So after school, I told her we could play out for a short while......she ran with it.....she did everything she could do with the snow in a short time......including mowing it.  Yep - you read that right - she pushed her little plastic mower through the snow like she was mowing the lawn.....that was super cute.  lol!!!

Well- that was alot of information - huh?  Sorry - my fingers are feeling rather chatty tonight - haha!!!  Wanna see the layout????


Get it?  Snow cute????  lol!  Here is a peek at the left hand side:


I used the splatter stamp from extreme elements to represent a snow ball splatter.  I stamped it with whisper white craft ink and let it dry instead of embossing it.

The title was cut with my big shot and the serif essentials bigz dies and the timeless type sizzlets.   {{luv}} it!

Here is a look at the right hand layout:


The designer series paper is from the subtles designer series paper packs.  I ran a strip of early espresso 5/8th inch grosgrain ribbon along the edge.  And - I had to add a layer of the tinsel trim form the holiday mini - I would love to see this come back to the regular cattie........it is so cute and sparkly!!! 


I also used the snowflake die and northern frost sizzlet strip die to cut my snowflakes for the vertical panel.  I added dazzling diamonds to the snowflakes randomly with a 2 way glue pen.  And then, I accented some of the flakes with designer buttons and the brand new white bakers twine.  A strip of whisper white card stock with some journaling rounds up the layout.

I would love to read your thoughts on my layout.....happy stampin'!

Tuesday, May 10, 2011

Happy Mother's Day

ETA: this post was supposed to post itself before the last post.....sometimes scheduling posts with blogger doesn't post when it should.....sorry about the wonky wording between the last two posts.  knowing that this one was supposed to post before the last one should make the hinting about fabulous florettes  make sense :)


HI All!  Happy Mather's Day to all the mommas and grandmas out there in blog land!!!

I wasn't able to share today's card with you until I saw my mom, since she follows my blog.  Her favorite color combo is black, white and red.  So - with those colors in mind - here is what I came up with:

I really wanted to use the new stamp set, Fabulous Florets.  I absolutely love this new set in the Summer Mini!!!  I used it for my Mom's card and one of my grandma's cards - that one will come later this week.  I also had to squeeze in using one of the new triple layer punches - I can't get enough of them :)  I used it two different ways in this card - did you catch that???

I used it to make the layered flower in the word MOM and I also used it for the boarder of the flower panel.  Clever, huh?  I thought so ;)  A pretty black satin bow brings it all together - after using the spritzer tool with a basic grey marker......I had to distress it out a little........lol

Well.....I better get back to blog surfing....hehehe!!!

Sunday, May 8, 2011

The Florets ARE Fabulous!!!

Hi All!

I promised you in the last post more of Fabulous Florets......I won't let you down, I hope :)  I really, really, really love this new set.  I started today's eye candy with a sketch challenge from Create with Connie and Mary.  see?


This one was for one of my Grandmas for Mother's Day.  The base is pear pizazz.  The designer series paper is greenhouse gala - still lovin' it!!!!  I stamped the silhouette stamp from fabulous florets in pear pizazz onto whisper white.  It, and the designer series paper, is matted with early espresso.  I also made a horizontal panel with the ribbon edge border punch and a bow tied from daffodil delight taffeta ribbon.  sooooo sweeeeeeeet!


Did you get a close look at those flowers?


 I used pumpkin pie and real red classic ink refills to flood their color in.  I cut them out adhered them down in a  natural fashion with a combination of stampin dimensionals and snail on each flower - making parts of the flowers stand up while other parts are adhered straight to the card.  And then I had to add some adhesive backed pearls in all different sizes to create the flower centers.

Well - that about sums it up :)

Thursday, May 5, 2011

Beautiful......Always

Hello, again ;)

This could be a record for me.....hehehe!!!  I have been on a scrap booking roll in honor of National Scrapbook Month.  It feels really good to be just about caught up for this year...I'm not caught up, but close.  Closer than any other year.....lol!!!

I have always loved Page Maps by Becky Fleck and I stumbled across the Page Maps Blog a few weeks ago....and they have a sketch challenge....and you all know how I {{luv}} a challenge......lol

So, here is the sketch that was provided:

I had just. the. picture. for this layout.  I took a close up of my daughter the day of her Dance Recital photo shoot before she had her towel wrap over her leotard....she just turned around and I snapped a picture.  I had to pull it out for this sketch.  Wanna see what I did?

Well - how did I do?
The card base is crumb cake.  I'm sure you are all surprised ;) .....I adore crumb cake.  The designer series paper is from elegant Soiree  .  The flower is made from layering paper daisies that I sponged marina mist on and petals from the blossoms petal punch.  I adhered the layers together with a 5/8 inch jumbo brad - these make the greatest flower center.

Something to note....the horizontal very vanilla panel behind the picture looked pretty bland on the left hand side and I knew I was going to do the journaling on the right......So I pulled out Always and stamped the flourish with crumb cake ink. 

Did you see the banners at the bottom??

 I made those from cutting rectangles out of scraps of designer series paper.  AND then......magic happened.  :)  I used the brand new postage punch to cut the V out of the banner and then to adorn the top edge of the banner.  Sweet little detail, I think.  I also decided to layer a marina mist and a night of navy button on them that I first tied a bow using the brand new early espresso bakers twine.  Oh me Oh my......these new goodies are absolutely awesome!!!! 

Wednesday, May 4, 2011

Imagine.......

the possibilities when you are in a room full of little dancers  So many dreams and aspirations all in one place.  Will any of these girls grow up and be professional ballerinas or tap dancers????  Who knows?  But just imagine if they do........

Oh yeah - wonder where all of this is leading?  I guess I started into my ramble without even showing you any pictures.  sorry about that :)

These pictures are from a photo shoot at my daughter's dance school.  I snapped a few pictures in between the professional photographer's times.  The girls did pretty well with the amount of time they had to sit around.  But in my scrapper's mind.....I knew there was a layout waiting to be scrapped.....lol!!  wanna see?

As always - I covered the faces  - I know - I am weird that way....sorry.

The base page is textured basic black.  The tags are made from whisper white card stock with stripes of pear pizzazz and marina mist designer series paper from the brights paper pack.  Oh my - did you catch the silver glass glitter stripes???  So divine........  I adhered it down with crystal effects.  Is there anything crystal effects can't do????   Oh yes - there is one thing.......it did not shovel my sidewalks last winter when we got snowed in e.v.e.r.y.d.a.y. .  So, i guess it can't shovel - but other than that, it does most everything.  :)

I punched holes with the crop o dile and tied bows with the new white baker's twine - super stoked when Stampin' Up! came up with the baker's twine.....ba da da ba bahhhh.....i'm lovin' it!  LOL!!!!

OH - You were asking about the flower page accents.  Well - I am so glad you asked.  They were made from punched out shapes from the brand new triple layer punches....another must have!!  I put black glimmer brads through as centers and punched out leaves with the blossoms layer punch with pear pizzazz card stock.  You gotta see the bling up close....check it out:

Don't you love it?  I sure do.
let me know what you think - i won't bite :)

Tuesday, May 3, 2011

GO - FIGHT - WIN!!!!

Howdy all!!

Guess what?????  I have another scrapbook layout to share with you today.  My daughter started cheer leading lessons this spring.....and you know that brings another opportunity to scrapbook.....not that I needed another event to scrap ;)

Well - let's just get at, shall we?

Here is the two page spread - I ran out of post in note squares by my photo taking station.....I won't mention who uses them to "post a note" all over the darn place.....but if you look long and hard in these pictures - I bet you can guess ;)  So I tried to blur out the faces of the other little cheerleaders.

well - do you see all of that BLING????  This page is all about bling baby!

The whisper white layer of background was stamped with the star image from Starring You.  The row of strips is just red, basic grey, and black strips of various designer series paper in a random pattern. - what an awesome way to use up scrap strips - mine weren't scraps....but if they were it would have been a bonus.  And did you see the red glimmer paper?????  {LOVE} it!  It is still orderable - on the carry over list - thank you Stampin' Up!.  And the great big ric rak strip - cut with my big shot and tasteful trim die - another baby on the carry over list.  :)

Oh my - I almost forgot to mention - the megaphone!!  It was cut with the petal cone die!!!  I made the handle with oval punches.  The title is Stampin' Up! chipboard that I covered with tombo mono adhesive and silver chunky glitter.  I'm telling you - this page is sooooo sparkly in real life.

Here is a closer look at the left hand page:

My journaling was done on My Digital Studio and printed out onto whisper white card stock.

Now, onto the right hand page:

All of the details are the same except for those cute little cheerleaders in the bottom corner......

I used so many punches, I probably couldn't list them all - but they are all current Stampin' Up! punches.  Their poms are actually silver for their team.  I made the skirt to match their competition cheer outfits....and I didn't think it through on the vest - the competition vests are exactly like those except they are black instead of white - argh!!!!  Oh well - I will make the cheer outfits all black when I scrap their parade pictures or the competition photos.......{{sigh}}  :)

Well - I would love to know what you think.  Have a great week!

Monday, May 2, 2011

bunny *licious*

Hi stampers!!!

Guess what????  To honor National Scrapbook Month - I have several layouts lined up to share with you.  I didn't get to participate in the Create with Connie and Mary challenge last week - and boy did I miss it.  This week is a color challenge - and instantly I knew what I was going to do.  Wanna see the colors?

What came to your mind?


oh really????  This is what came to mine- instantly.  :)


Let's start with the left hand side:

Before we go any further - I want to explain.  The post it notes on my pages were intentional - I am super weird about my daughter's face being online - but I don't want that to stop me from sharing my pages and ideas with you.  Sorry if this offends any of you if this is yoru first time stopping by - but that is why there are bright colored squares all over my daughter's face.   lol

The title is chipboard that has been covered with whisper shite craft ink and embossed with iridescent ice embossing powder.  The chipboard is retired - still Stampin' Up!, but retired.  I have a package of the current chipboard alphabet - but alas, I couldn't find it.  argh....but that is another story ;)

Take a closer look at the blingage on this page:

Did you notice the wild wasabi satin ribbon???  I know!  We don't have that!  I took a piece of white organdy ribbon and used my wild wasabi stampin write marker and colored it - easy peasy, lemon squeezy (right from the mouth of my 5 year old :)  )  And then I adhered the ribbon pieces to the page with subtles glimmer brads - {luv} these!!

Now, let's move onto the right hand page......

Don't you think the little tag is so sweet peeking out from behind the pictures?  The butterfly was punched with the butterfly punch out of pale plum card stock.  I stamped the flourish from Easter Blossoms.  I sure hope this set makes it into the cattie.......please, pretty please with a cherry on top.........  The eggs and sentiment are also from this set.  I sprinkled the eggs through wild wasabi grass  :)  The polka dot paper is from the subtles designer series paper pack.  What a great way to get designer sheets from an entire color collection.  I hope it doesn't disqualify me for using retired stamps - I made these layouts last week when they were current...but wanted to save them for National Scrapbook Month - not thinking that the stamps wouldn't be current :(

I would love to know what you think of this 2 page spread.  I was so inspired by the color choices....and I hope in some way I have inspired you.

Happy Stampin'