Showing posts with label blog tour. Show all posts

Tuesday, March 27, 2012

PCS High Tea Blog Hop

*NOTE – High Tea blog hop officially starts March 28th so if you’re here a little early, be sure to come back and see all of the projects the PCS design team has created for you.


Welcome to the Paper Crafters Sampler “High Tea” blog hop featuring our 3D teapot template from the March issue of the Paper Crafters Sampler entitled, “Orange Blossom Tearoom”.

With the current trend of tea images in the paper crafting world, it only seemed appropriate to offer a tea-related template, and that is our newest “High Tea” 3D, teapot.

Now-a-days, teapot come in so many sizes and shapes, it was easy to select one for my inspiration. What did you think of what I’ve created ?

I took my inspiration from pictures of Vintage French Enamelware Coffee Pots - I think they look more like modern day tea pots ;)  Here is my inspiration photo:


I did a fun little technique to get mine spotty and shiney :)  I first cut out the template and then went to town.  This template was very easy to put together and super fun!!  Here are some shots of it:


The lid even comes OFF!!!  And there is an opening in the spout to pour treats out of!


I had SO much fun embellishing this beauty!  Here is a close up of the flowers and hopefully a better picture of the finish of the tea pot :


There sure are some AWESOME tea pots on this tour - make sure to make your complete round through the tour.  If you started here, you can make the full round and end up here.

Make sure you visit all the design team members' blogs for fabulous ideas! As a "thank you", each design team member will randomly pick a winner to receive the Orange Blossom Tearoom issue for FREE! To enter, leave a comment on our hop posts by Friday. And join in the fun of making your own teapot!


Now, feel free to go back and take another at  Tiffany Bauer's teapot images or select the “Click Here” button before and hop on over to Karen Squire's  blog.  
 
 
I would love to know what you think of my tea pot - have a wonderful tour!


Friday, July 9, 2010

There is a Greenhouse Gala at The Crystal Palace!!

I gotta tell you - if you hadn't figured it out already....lol! - I am totally smitten with the new Greenhouse Gala Designer Series paper!  It has so many awesome designs all in one package..........oh to be in {luv}

We recently took a trip to Walt Disney World for eight days....so I have plenty....and when I say plenty.....I mean P.L.E.N.T.Y.!  I think I had about 1000 pictures printed...and I didn't print near all I had taken.  Gotta love digital :)  Even my four year old said on the third day at breakfast...."mom, you don't have to take pictures of me eating everyday....."  I was like...REALLY?????  Even she has me figured out!  I did not leave the room for ANY reason without the camera.....you never know!  hehehe!!!!  Oh well..someday she will appreciate me taking a picture of her eating a chocolate crown with chocolate all over her face, dressed to the nines in princess garb, eating a $140 meal in Cinderella's castle....right????  LOL!!!

Oh well....back to today's post!  I am plugging away slowly at our vacation photos and I had to incorporate Greenhouse Gala in there somewhere!  There are so many pictures of beautiful gardens, scenery, etc to scrap.  Immediately I thought of our character meal we had at the Crystal Palace in Magic Kingdom.  So I got to scrappin'!  I still have another two page spread of the Crystal Palace with my little one and the characters....but that will have to wait for another day :)

Here is my two page spread:

The base page is textured baja blue.  All of the designer series paper is from Greenhouse Gala.  The three flower along the top of the right hand side are stamped using Friends Never Fade set, as are the two tangerine tango flowers that are on the journaling block - top note die - (what would I do without the top note die????)  and in the center of the picture block.

My title was cut with the Timeless Type Junior Alphabet set and the big shot

I cut the entire title out twice, once in baja blue and then again in daffodil delight.  I layered them off set and adhered them together with a two way glue pen.  I then took my white gel pen and gave the letters dimension by adding reflection marks.  I then adhered them to the page with my two way glue pen

Did you ever put something in place and think.....that just looks "flat."  I don't mean flat as in not "puffy"....just flat.  Do you know what I mean?  So I thought...What else can I do to those letters once they are glued down?????  Crystal Palace.....Crystal......Hmmm......Crystal......CRYSTAL EFFECTS!!!!  Yes!  I will put crystal effects over the letters - that will give them a glassy look.  The Crystal Palace is almost all glass.....that will work.  Then it hit me!!!!  Sprinkle the letters lightly with dazzling diamonds!!!  Dazzling diamonds will fix anything!!!

WELL????  How did I do?  I would love for you to let me know, leave me a comment below and then click on the "next" icon to continue on the tour.  Today is the last day - You won't want to miss the ride!!!

Thursday, July 8, 2010

When in doubt.....CASE!!

I couldn't get my mind off of the sample on page 115 of the Idea Book and Catalog that used the new set, homegrown.  I don't have that set, yet......., but I knew I could CASE (copy and share everything) it using one of my favorite new sets, Friends Never Fade.  You know...the best source of inspiration is already in your hands.....or it should be ;)....the Idea Book and Catalog!!!  So - I went to work!

How did I do?
The card base is crumb cake (i {luv} that name....).  I stamped the flower image from Friends Never Fade in the new crumb cake classic ink and then took that baby to my color catcher and smooched it with my log cabin smooch spritz

The main image panel started out as confetti white.  I first embossed the flower image with clear embossing powder and then stamped the same flower with stamped off early espresso ink around it.  Next, I stamped the A to Z background stamp in early espresso.  Next - I "funned" the image up by sponging some color on the embossed flower.  I couldn't go on with out getting a little dirty....now could I? ;)  I sponged crumb cake ink on the edges and lightly in the center.  Next, it got matted with chocolate chip and pear pizzazz card stock.  How about a closer look??

The horizontal panel is a strip of greenhouse gala designer series paper matted with a strip of baja blue.  I attached two white buttons from the Neutrals button collection with linen thread.  I wanted to pull some of the orange color up into that panel so I cut a thin strip of tangerine tango and trimmed the edges before adhering to the entire panel.  My sentiment is from Perfect Punches.  I stamped it twice.  The back layer was punched with the wide oval punch and the front layer was punched with the large oval punch.

I would love to know what you think of today's card.....I have a scrapbook layout to share with you tomorrow :)

Click to keep going on the tour :)

Wednesday, July 7, 2010

My wheel fell to pieces......

......I will spare you with the Patsy Cline lyrics today :)  Hard to believe I can quote you Metallica to Patsy Cline....what's up with that?!?!??!?  lol!!

Today is the first day of THE RemARKable Stampers Blog Tour for the NEW catalog!!!!!!  WHOOOHOOOO!!!!!!  Don't you just absolutely love the new cattie?  Oh my......Every catalog and mini catalog out does the last - How does Stampin' Up! do that??

When I first laid my blue eyes on the Baby Tees wheel - I HAD to have it!!  I probably won't even use it as a "normal" wheel.....I wanted it for the individual onsie images.  They are totally darling!  And I mean d.a.r.l.i.n.g.!!!  My little one has always loved rubber ducks, since before she was even a year old - obsessed with them, actually - so I am drawn to rubber duckie images :)  So, I had to make my first onsie card with the duckie tee!  Wanna see??


Do you?????


I mean - we could talk about the obscene weather we are having in Pennsylvania this week.....


We could talk about my lack of a voice this week........


What?!?!??!  Show you the card already??  OK........


Well?  What do you think?

Did I mention that I also love the Greenhouse Gala Designer Series Paper??  It is somewhat a formal, beautiful floral/medallion pack of deliciousness.....but I was determined to use it on a boy's baby card.  How did I do?

The card base is daffodil delight.  My picture sure doesn't do it justice.  It is the prettiest, creamy, buttery yellow......so pretty!  The "ric rak" paper is from Greenhouse Gala.  I cut out the bottom to accent the pattern and layered it on a piece of baja blue before adhering to the card front.  I wrapped a piece of white satin ribbon around the seam.  See the scallop circle?  It is the brand new 2 3/8 scallop circle punch - {luv} it!  I first stamped a piece of pear pizzazz with the homemade single stamp in pear pizzazz and then punched it out.  lovely, huh?  Doesn't that scallop punch mat perfectly with the 1 3/4 circle punch???

My sentiment is from the new set, Perfect Punches.  I inked it with stampin' write markers and then punched it with the modern label punch.  I then used my bone folder to break down the fibers in it so I could adhere it down "banner style."  (hehe!)  I accented the sentiment with a button from the brights button collection and a piece of crochet thread. 

See the onsie???


Isn't it just darling?  (not to toot my own horn.....I think it is cute ;))
I stamped it three times and then paper pieced it together.  It was stamped once on the greenhouse gala paper, once on pear pizzazz and then on whisper white.  The ducks were colored with so saffron and daffodil delight stampin write markers.

Well, that about does it for today.....let me know what you think about this card and then click on the icon below to continue on with your tour.....you will not want to miss a single stop!


Friday, May 7, 2010

And Two become.......

THREE!!!!!!

After I leave the wedding with my gift in hand......I find out my happy couple have decided to have a baby!!  They are expecting a girl!!!!  So, what is a girl to do?????

Make this!

Did you know that you can still order tiny tags and the tag punch from the last mini catalog????  You can!

And check out these babies!!!!  - pun intended ;)

This is a bitty button from the Summer Mini!!  how awesome are these????
I stamped the flower with itty bitty bits and then punched it out with the coordinatingitty bitty shapes punch and adhered it to a bitty button!!!!!  Oh my......these are sooooo exciting!

And did you notice the square lattice embossing???  I accented it with pale plum ink rubbed on with a stampin' sponge.
card stock: whisper white, old olive, certainly celery, pale plum, perfect plum, commatge wall ds
ink: pale plum, whisper white, old olive, perfect plum
stamps: nursery neccessities, tiny tags, itty bitty bits
accessories: big shot, timeless type alphabet, scallop square punch, 1 1/4 square punch, white taffeta ribbon, itty bitty punches,  jewelry tag punch, stampin dimensionals, square lattice embossing folder

make sure to head on to the rest os the tour!!!

Happy Stampin'!


Thursday, May 6, 2010

What is the next step??

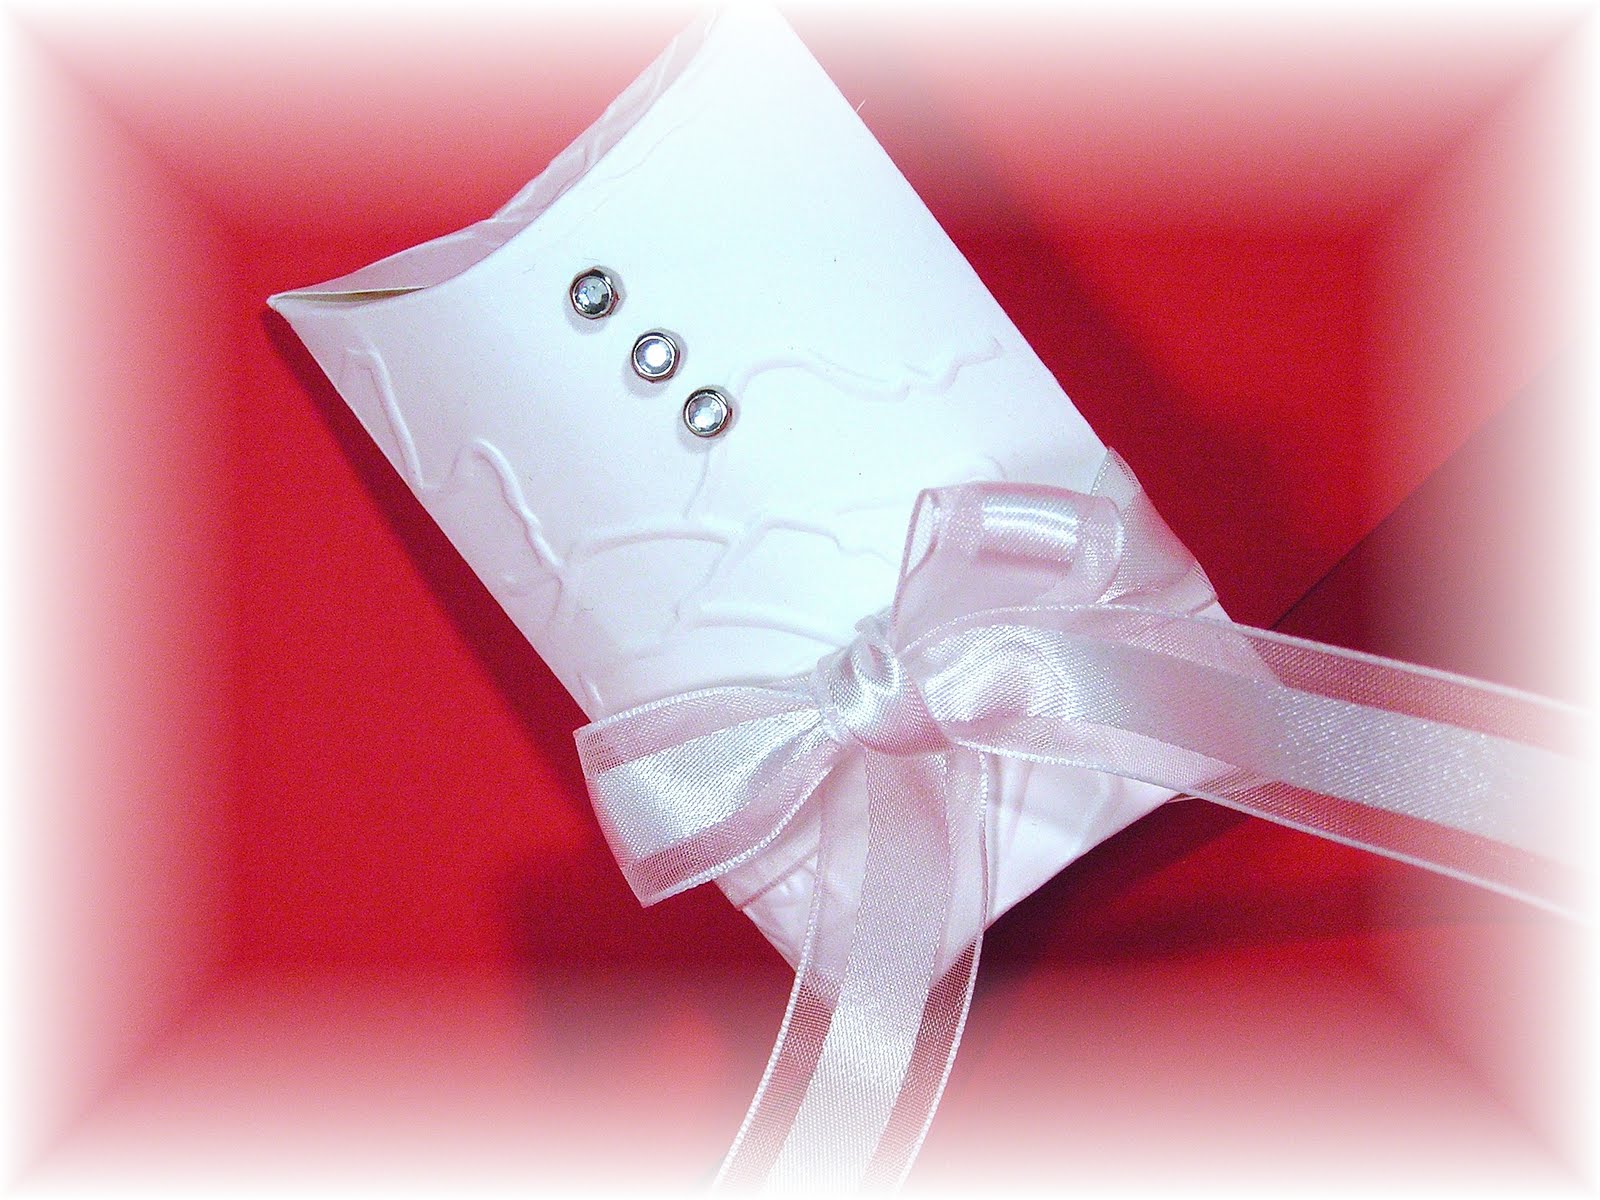
Well.......We made a card to attend a wedding.....now we are at the wedding and we need to give.receive favors, right????  Or ..... We need to make a gift holder to hold gifts from the bride and groom to their wedding party....jewelry, cuff links, gift certificates, small perfume/colone bottles as gifts....etc......
There are so many uses for these little babies :)
Wanna see them????

do ya????

Well.........do YOU?!??!?!

Ok.....here they are:

The happy couple returns again today!
They are both constructed with the pillow box die and the big shot......cool, huh?  {nothing like tooting my own horn.....LOL!!!}

Here Comes the Bride.......

All dressed in Shimmer Card Stock.......embossed with the manhattan flower embossing folder!  She is accented with her clear rhinestone brads and a bow of white organza ribbon!!

And her groom.....he is so handsome!

His tux started with a pillow box of striped bride specialty paper - gorgeous in itself!!  The he was suited with a basic black, double breasted tuxedo jacket.  His buttons are black brads from the vintage collection of brads.  His tie.....well, 1/4 inch basic black grosgrain ribbon, of course ;)  He also has his boutinier (sp!???!)
on today! 

It is cut with the big shot and the Build a Bear Stampin' Up! Beary Lovely sizzlet.  Yum!!!  I put the side petal on a stampin' dimensional to give his rose a boost!

Well.....you all were quiet yesterday, leave me some lovin' before you move on to the next stop.  Wonder what day three will bring????  hhmmmmm.........


Wednesday, May 5, 2010

Wishing you happiness......

Hi Stampers!!!

Are you enjoying our Special Occassion Blog Tour???  There are some mighty fine ideas, huh? 
Today, I want to share a wedding card with you.  I had a TON of fun dressing up my bride and groom!!!

Well?!?!??!??!  Sweet, isn't it?
The black main panel is embossed with the brand new embossing folder, square lattice.  I love that design!!!
All of the white shown here is shimmer white card stock.....it is so beautiful, but is hard to capture with the camera.

The bride is made from cutting a scallop heart from the embosslit die, scalloped heart of hearts.  Her dress also consists of the full heart punch that has been embossed with the manhattan flower embossing folder.  She absolutley needed the clear rhinestone brads blinging up her gown.....accented with a white organza bow!!

The groom's attire was started with a shimmer white heart that was cut with the heart die in the movers and shapers die assortment.  He then was adornes with a tuxedo shirt that was punched with the full heart punch using the bride specialty paper, the striped pattern.  His tuxedo jacket was also constructed with the full heart punch, cut apart to make collars, with are mounted up on stampin' dimensionals.  His shirt was accented with black brads from the vintage collection brads and a bow tie of basic black 1/4 inch grosgrain ribbon.  Don't they make an amazing couple together??

Take a closer look at the happy couple:

Don't they look happy???
I would absolutely love to know what you think of my happy couple :)

After you let me know how you feel about this this fine display of wedded bliss....make sure to click on the icon below to continue on the tour....you will NOT want to miss a singe stop :)


Friday, March 5, 2010

RemARKable Going Green Blog Tour - Day 3

You're my going green girl.....and she used to sing sha la la la la la la la la la la ti da....la ti da!!

oh yes....that is right!!  I have a "green" girl stopping in for a visit today, the last day of our going green tour.  Have you been enjoying your green ideas?  I sure have, there are tons of great green ideas on this tour!!!

My green girl wanted me to use up scraps today and only use minimal new pieces of card stock.  So with thatin mind, I only cut a new card base and trimmed down already cutpieces for the main image panel and mat.  The ribbon was tied right off of the roll, so there was minimal waste there.  Wondering what my "scrappy" green girl look like???

I thought so....here she is:

Oh Stamping Tessa, you look so fresh and green :)  You have just came from the farmers market with your fresh flowers and your recycleable shopping bag.  Your clothes were even paper pieced with scraps my green Tessa! 

Oh Tessa.......is that a recycling logo made out of the small arrow form the going my way punch???
Why, yes that is.  You should look closer at it......

recipe:
stamps: totally tessa, tiny tags
ink: basic black, close to cocoa, chocolate chip, blush blossom, pretty in pink, garden green, cameo coral and ruby red
card stock: old olive, certainly celery, confetti cream, sweet pea ds, rich razzleberry ds
accessories: two way glue pen, aquapainter, going my way punch, modern lable punch, three for you punch, antique brads, so saffron ribbon, stampin dimensionals


Thursday, March 4, 2010

RemARKable Going Green Blog Tour - Day 2

Oh wow!!!  Are you getting some great "green" ideas, or what!?!??!!?  I am so priviledged to be a part of such a great team!!

Today, I am going to show you a hostess gift for all of you demos out there....but if you aren't a demo, you can duplicate this idea for a stampin' friend that you would like to give a small supply gift to or you can use this idea for any small gift packaging - like money :)

You love Stampin' Up!'s build a brads, right?????  What is not to love about those babies!?!?!?!?  Well - I couldn't bring myself to ever throw out the container they come in - what an awesome tin with a window lid!  Wanna see what I did with it?


Isn't that darling???  I wrapped the bottom with Noveau Chic designer series paper and then made a belly band to hold it closed.  It wasn't necessary to have soemthing hold it closed, but it looked cute :)
I filled it with some stamping accessories as a door prize.  Let's look closer at that flower, shall we??

I think we shall.....

I absolutely LOVE the floral fusion sizzlet!  I cut the flowers out in velum card stock and sponged then with sage shadow and then used the spritzer tool to add some basic grey color splashes.  And the half pearl from the pretties kit is the perfect center to this beauty.

Before you leave me, spread a little green love and let me know what you think and then click on the icon below to continue on your tour!


Wednesday, March 3, 2010

RemARKable Going Green Blog Tour - Day 1

HI Stampers!!

Are you ready for a green tour????  If you are coming here directly, just click the Going Green logo at the bottom of the post and you will go through all of the stops and when you arrive back here, you have completed all of the tour. 

What does "Going Green"  mean to me in paper crafting??  Well, one thing it means is the obvious....all green.  It also makes me think of nature, the beauty of the out doors.  It also means repurposing.  By that, I sometimes take things that are packaging for other things - meant to be garbage - and use them for other purposes.  Like today's project, for example.  It started out as a bracelet package from a chain costume jewelry store that my little one bought.  It was full of pretty colored beaded bracelets - just what every four year old would be drawn to.  :)  We took the bracelets out and I grabbed up that packaging right away!!!

I wanted my flower to be the real focal point of the container, so I kept everything else very simple and plain. I made a flower like this before HERE and have had several requests for a tutorial so make sure you come back Monday for that tutorial.

Here is a side shot:


There are alot of people out there in the paper crafting world that are punching their vintage books and novels - I recreated this look by stamping A to Z from the Ocassions Mini onto very vanilla card stock.  this way, I can get a vintage written look without having to worry about what exactly I written on the pages.  I sure wouldn't want to give my Gandma a flower that had soemthign inappropriate written on it without realizing....so with this stamp, I am safe.  :)

The leaves are from the Sweet Pea Felt Flowers and the designer series paper is from Sending Love Specialty.  {luv} these!!

I realize you probably wouldn't ever be able to recreate container this exactly, unless your four year old buys the same set of bracelets....lol! ...but there are lots of pieces of packaging that this could apply to.  So on your way to the trash next time...ask yourself, could I repurpose this into something pretty???

I would love to know what you think.  I will fill this with small somethings - probably candy - and give it as a gift.


Friday, January 1, 2010

RemARKable LOVE Blog Tour - Day 3

Wowza, huh!??!?!?!? There are some really great ideas on this tour....I hope you aren't missing any of them. It is the "LOVE" tour and that can be interpreted in many ways - things you love, valentine's love, marriage and the straight out "love" theme. I focused on the straight out "love" theme for this one. Don't get me wrong...I could have easily said it was things I loved that are coming out in the next mini.....because it is!!

Well!??!?!?!?!
I really do love it! I did not put anything on the inside - i am still debating what I will do with this one - hubby's valentine, anniversary, wedding - who knows??? The card base is actually kraft - but you can't tell that all in the picture - the 1/16th inch border of card base didn't show up much ;) I was going to use more kraft on the card front but I kept leaning towards the chocolate chip - can you blame me? It is chocolate chip, for pete's sake!!!! lol!

The designer series paper is coming in the mini, Sending love Specialty Paper - and it is "Special" let me tell you!!! It is glittered and blingy all over!!!! delish! I made my own shabby lace by using the eyelet edge punch and folding it up in small sections. My scallop circle was made the "old fashioned way" - you know before we had the big shot scallop circle dies - with a corner rounder. None of the sizes of scallop circle dies I had were exactly the size I needed, so I made my own with the circle scissor plus and the 3/16th inch corner rounder. The birds are punched from a brand new punch, 2 step bird punch - lOVE IT!!!! I stamped the wings with the same heart stamp I used for the pink heart in the background - I {love} Hearts. This set is so awesome!!! After I punched the birds, I ran them through the big shot with my finial press embossing folder. All sponging is done with creamy caramel. The bow was made from chocolate chip taffeta ribbon.


Oh and did I mention D.I.M.E.N.S.I.O.N.???? I think I used like 32 stampin dimensionals on this card! I {luv} dimensionals!

I would love to know what you think of these love birds. If you have enjoyed the projects on my blog, I invite you to stop back - I have loved having you. Now - before you go - Click on the icon below and spread your love throughout the rest of the tour! :)