LOL!!!
Yesterday when I photographed and edited the picture for today's post, I was singing a song in my head with the "fabric" substituted for the actual lyric....but it is early and I didn't write it down. lol! My sarcasm just comes to me, I guess I can't preplan it. Would that make me a "stand up sarcastic blog poster????" Probably not, even stand up comediens preplan, huh? Oh well.....we will move on anyway.
I have been playing around with our new fabric line......oh how yummy it is! I can't seem to get enough of the Deck the Halls collection. How awesome would it be if it would expand with more coordinating fabrice that didn't leave us with the Holiday mini????? Seriously - how awesome would that be??? I know, right???
Well, I have two fabric projects to share with you today. A french style memo board and a little piece of wall art for the Holidays.
We will start with the memo board.
This was my sample board for a stamp camp I held a couple of weeks ago. We made a glass jar with decor elements on it fro Halloween. It was super cute and wayyyyy super easy. And then, we all made a memo board using Designer Fabric. I took a bunch of the fabric to the camp and let everyone pick their own to make everyone's memo board personal. We had a great time at the camp - the memo boards the girls did were awesome! I have to say though when I asked my hubby for his staple gun for a Stampin' Up! class.....he did look at me like "are you serious.....a staple gun for stamping?" And I think the girls that were at the camp got the same reaction from their hubbies. ( I had them bring a staple gun if they had one to help with time )
Oh sorry.....I got really off track, huh? And to think.....I haven't even had my diet Coke or Coke Zero yet this morning. Maybe lack of caffiene makes me meander through my thoughts......or maybe caffeine makes it worse? Hmmmmm....... There I go again!
Anyway - my memo board was made with the Cherry Cobbler fabric from Deck the Halls. I told you a while back that Cherry Cobbler was my favorite red we have .....didn't you remember? So - when Stampin' Up! gave us a fabric that was cherry cobbler and very vanilla - it was meant to be.
The ribbon pattern was made with the new Cherry Cobbler 1/2 " Seam Binding. I gotta say - I {luv} this stuff! It is so smooth and flexible and soft.....do you get the picture? lol! Where the binding intersected, to accent the quilted look of the memo board, I placed antique brads. I gathered the seam binding through the prongs and put them throught the entire board to pull the fabric down a bit. Wanna see?
You like? I do!
Oh boy.....and I said there were two projects to share today. The second one is a wall hanging I made for the Holidays coming up. I gotta say.....I think this is really cute. Boy, I am full of myself this morning, uh? lol! Without further delay......here it is:
I told you it was adorable....WHAT?....You didn't believe me? After all this time, you still don't trust me? That hurts. Really hurts......
The background is just an ordinary piece of muslin that I sandwiched with another piece of muslin with quilt batting - bamboo quilt batting - ever hear of it? Made me feel really "green" since I was using it on a tree project. lol! I then machine quilted it at an angle. It isn't perfect...please don't measure down to the 1/16th of an inch.....I didn't care that it wasn't perfect, to be honest, it is to look "shabby - country - cute" That is a professional decorating term, right? lol!!
The tree pieces were cut with my pennant die (the smaller pennant) and big shot. Do you give yor big shot massages weekly? You should - it make sit more relaxed to pump out great projects like this :) Each "pennant" is three layers - a piece of muslin and then a piece of wool felt and topped off with a piece of fabric from Deck the Halls. I adhered the tree down onto the background and then added a trunk.
The tree trunk is simply a piece of wool felt cut with the new Scallop Squares Duo Bigz Die in the Holiday Mini. I stitched it right to the background piece very haphazardly with two colors of thread to kind of simulate tree bark.....how did I do?
After I had the tree, tree trunk and background all sewn together - I snipped all of the scallops and throught that baby in the washer and dried it in high heat to get the normal shrinkage you get with 100% cotton fabric in high heat. Oh and the adorable fraying too!! I was looking for that!
No tree is complete without decorationg, right? Right....that is what I thought, so I adorned my tree with Deck the Halls Big Designer Buttons. I tied bow with the 1/8th inch very vanill tafftea ribbon through the buttons before adhering them to the tree. See??
And a tree topper......I must admit, I wanted to use the star die with some mustardy colored felt....but my felt color that I had just didn't mesh well with my tree....so I pulled out soem very vanilla taffeta ribbon and made a bow that I then acented with more 1/8th inch very vanilla taffeta and another big button. Take a look at that:
You like? I was very please with this tree.
What were your inital reactions to the projects in this post? Leave me a comment below and let me know! I do have two more things to share with you that I made out of more fabric...but that will have to wait until later today. Oh yeah - you will get two posts today....after all - you deserve it, I have been so sporadic posting lately. I am really sorry for that!
toodles :)
Thursday, September 30, 2010
Friday, September 24, 2010
Are you now???
Yeah....that is the response of my hubby when we were on our way home from our daughter's swimming lesson last night. Here is how it went down.....
me: i am going to stamp while you give L (my daughter) a bath
hubby: oh really?
me: yep
hubby: you are going to stamp while i give the bath??
me: yeah - i AM going to stamp. i haven't in a while, a long while, so tonight i AM going to and you ARE giving L a bath
hubby: are you know?
me: yes
hubby: if i knew that i would have eaten dinner.....(he was [probably thingink - you know that drive through crap you jsut bought for L)
me: {{what???}} (that is what i was thinking....here is what i actually said.... ) this isn't a discussion....i am telling you what i am going to do. end of debate. i am stamping. tonight.
hubby: silence with a bit of snickering.....
So that is how it went down.....oh yeah....I held my ground. LOL!! The discussion wasn't nearly as stern as it sound all typed out, but that is how it went. Maybe i will try that again tonight. lol!! Meanwhile our house is in utter disarray from our increasingly hectic schedules.....but i WAS going to stamp. darn it....I was stampin'!
But anyway....I had a rough idea of this week's mojo monday sketch in my head all week. So I went from there for today's card. I spent most of my time last night working on something I am submitting to Stampin' Up! for a demonstrator contest - which I probably won't have a snowball's chance in fire of winning - but I had an idea in my head for a contest titled "Christmas" and wanted to do it. "Christmas" sure is a broad category....but I still wanted to do it.
Oh - you want to see what I made that I actually could show??? Oh - sorry. Here it is:
it's cute, right? My mojo maybe isn't up to par right now....but I can run a 5 year old around to practices and lessons like nobody's business.....yeah that is right - you heard me....I can do it. lol!
I {luv} the new glimer brads that are in the Holiday Mini!!! **yummo**
And did you notice the dazzling diamond snow??? You know that is a bitter cold night when the snow sparkles! So - enough of the 88 degree days already!!!
Well, I better run.....off to my next task. balancing the checkbook.....yipee!!! you did read that with a bit of sarcasm in your head voice, right?? because it was there.....read it again...there is sarcasm.
Happy Stampin'!
me: i am going to stamp while you give L (my daughter) a bath
hubby: oh really?
me: yep
hubby: you are going to stamp while i give the bath??
me: yeah - i AM going to stamp. i haven't in a while, a long while, so tonight i AM going to and you ARE giving L a bath
hubby: are you know?
me: yes
hubby: if i knew that i would have eaten dinner.....(he was [probably thingink - you know that drive through crap you jsut bought for L)
me: {{what???}} (that is what i was thinking....here is what i actually said.... ) this isn't a discussion....i am telling you what i am going to do. end of debate. i am stamping. tonight.
hubby: silence with a bit of snickering.....
So that is how it went down.....oh yeah....I held my ground. LOL!! The discussion wasn't nearly as stern as it sound all typed out, but that is how it went. Maybe i will try that again tonight. lol!! Meanwhile our house is in utter disarray from our increasingly hectic schedules.....but i WAS going to stamp. darn it....I was stampin'!
But anyway....I had a rough idea of this week's mojo monday sketch in my head all week. So I went from there for today's card. I spent most of my time last night working on something I am submitting to Stampin' Up! for a demonstrator contest - which I probably won't have a snowball's chance in fire of winning - but I had an idea in my head for a contest titled "Christmas" and wanted to do it. "Christmas" sure is a broad category....but I still wanted to do it.
Oh - you want to see what I made that I actually could show??? Oh - sorry. Here it is:
it's cute, right? My mojo maybe isn't up to par right now....but I can run a 5 year old around to practices and lessons like nobody's business.....yeah that is right - you heard me....I can do it. lol!
I {luv} the new glimer brads that are in the Holiday Mini!!! **yummo**
And did you notice the dazzling diamond snow??? You know that is a bitter cold night when the snow sparkles! So - enough of the 88 degree days already!!!
Well, I better run.....off to my next task. balancing the checkbook.....yipee!!! you did read that with a bit of sarcasm in your head voice, right?? because it was there.....read it again...there is sarcasm.
Happy Stampin'!
Labels:
big shot,
christmas,
mojo monday,
winter
Friday, September 10, 2010
Oh.....how time just slips away!!
Is everyone else out there feel like they live in fast forward??? I seriously need a date book for my date book!! LOL!!! BUT - I did stamp something that I can share yesterday. YAY!!!! It felt soooo good to pull stuff out for fun! Well....it was in a mad rush....but it was still fun! heheheheeeee!!!!
I saw a sketch somewhere on someone's blog sometime ago......and for some reason it stuck with me. Aren't you proud?? I didn't have to sketch it down or add it to my favorites or go looking for it somewhere....it was just there when I sat down to stamp - so that is what I started with. Wanna see what I came up with???
Do ya???
I can't hear you.............
Ok....that is better! Here it is:
I absolutely love the Apple Blossom Level 2 Hostess set in the Idea Book and Catalog. I was immediately drawn to it......but sadly, this is the first time I actually pulled it out...and I have had it since July..... :(
But....all is well now - it has been inked and I still am lovin' it!!
I made this for my daughter's kindergarten teacher. I will need to send her a note at some point and I plan on using this card to do it. Last year, my baby was in a private preschool and I made cards for the teacher when I sent her tuition checks in and she really loved getting them - so I am hoping her kindergarten teacher will like the cards also.
The base is cherry cobler - LOVE this red!!! I mean I {{LOVE}} this red........really love it! I stamped the apple image in the bottom corner and added the sentiment "just a note" over it....over the 4u on the apple actually. Get it??? Just a note 4 u???? I need to get more sleep, huh?
The center panels are very vanilla stamped with images in Apple Blossom in marina mist, cherry cobbler, always artichoke and sahara sand. The sahara sand is the open dot stamp in the set - I'm not sure it shows up here..... Then I matted each of those panels with basic black. The horizontal panel is marina mist and basic black that I accented with black brads. The torn panlel is sahara sand. I wrinkled the card stock, crumpled it, flattened it, wrinkled some more, rolled it in a ball, and then just when the card stock thought it had a minute's rest - I pulled it apart to expose the paper fibers inside of the card stock!! Oh yeah, I showed it who was boss!! uh huh....I can really dominate a piece of card stock.....can you? lol!!!
So, back to reality....I wanted to inside to be a light color so I could write in it....so here it is:
sweet, huh?
WHAT????? I didn't hear you?
Oh - you have a question???
What is it?
Are you kidding me???? Where did I come up with this color scheme????
Do you people ever listen to me????? I got it straight out of the idea book and catalog! Now go get your book!!
turn to page 179. do it.
do you see the Simply Scrappin kit - Christmas Cheer? Oh yes I did.....got the color right there and threw in sahara sand for the halibut!
The next time you are stumped on a color scheme. start with you card base color...what do you want to use for your base??? Pull out your idea book and catalog.....and LOOK. :) Stampin' Up! does all of the work for us....all we have to do is execute our ideas.
Talk about work...I better run and get there :)
Happy Stampin' y'all!! (lol!!)
I saw a sketch somewhere on someone's blog sometime ago......and for some reason it stuck with me. Aren't you proud?? I didn't have to sketch it down or add it to my favorites or go looking for it somewhere....it was just there when I sat down to stamp - so that is what I started with. Wanna see what I came up with???
Do ya???
I can't hear you.............
Ok....that is better! Here it is:
I absolutely love the Apple Blossom Level 2 Hostess set in the Idea Book and Catalog. I was immediately drawn to it......but sadly, this is the first time I actually pulled it out...and I have had it since July..... :(
But....all is well now - it has been inked and I still am lovin' it!!
I made this for my daughter's kindergarten teacher. I will need to send her a note at some point and I plan on using this card to do it. Last year, my baby was in a private preschool and I made cards for the teacher when I sent her tuition checks in and she really loved getting them - so I am hoping her kindergarten teacher will like the cards also.
The base is cherry cobler - LOVE this red!!! I mean I {{LOVE}} this red........really love it! I stamped the apple image in the bottom corner and added the sentiment "just a note" over it....over the 4u on the apple actually. Get it??? Just a note 4 u???? I need to get more sleep, huh?
The center panels are very vanilla stamped with images in Apple Blossom in marina mist, cherry cobbler, always artichoke and sahara sand. The sahara sand is the open dot stamp in the set - I'm not sure it shows up here..... Then I matted each of those panels with basic black. The horizontal panel is marina mist and basic black that I accented with black brads. The torn panlel is sahara sand. I wrinkled the card stock, crumpled it, flattened it, wrinkled some more, rolled it in a ball, and then just when the card stock thought it had a minute's rest - I pulled it apart to expose the paper fibers inside of the card stock!! Oh yeah, I showed it who was boss!! uh huh....I can really dominate a piece of card stock.....can you? lol!!!
So, back to reality....I wanted to inside to be a light color so I could write in it....so here it is:
sweet, huh?
WHAT????? I didn't hear you?
Oh - you have a question???
What is it?
Are you kidding me???? Where did I come up with this color scheme????
Do you people ever listen to me????? I got it straight out of the idea book and catalog! Now go get your book!!
turn to page 179. do it.
do you see the Simply Scrappin kit - Christmas Cheer? Oh yes I did.....got the color right there and threw in sahara sand for the halibut!
The next time you are stumped on a color scheme. start with you card base color...what do you want to use for your base??? Pull out your idea book and catalog.....and LOOK. :) Stampin' Up! does all of the work for us....all we have to do is execute our ideas.
Talk about work...I better run and get there :)
Happy Stampin' y'all!! (lol!!)
Friday, September 3, 2010
I haven't forgotten......
About You!!!
My little one started kindergarten this week. And when she gets home, she is wanting me. Even if it is just to sit with her while she plays. Yesterday she asked me if we could do something together as soon as she got off the bus. I said well.......what would you like to do? (never agree to anything with her until you are sure of the expectations...lol! I wouldn't want to agree to working on head stands! lol!!!) She looked up at me, sweet as could be, and said.....can we just sit down and have a little drink together?? Really???? It means something to her that I actually sit with her and have a drink?? So, I had to agree to those terms :) So - I made us some lemonade to drink.....and those who really know me know that giving her lemonade is a real treat! I am a strictly milk and water for her mommy.......chocolate milk on special occassions only..... lol!
I spent the beginning of the week cutting and sorting and packaging up the ribbon shares - thank you very much if you ordered one!!! This is my first experience with school....so there are lots of new things in our schedule that weren't there before. I will get back in the swing of life soon - I pinky swear!!!
My little one started kindergarten this week. And when she gets home, she is wanting me. Even if it is just to sit with her while she plays. Yesterday she asked me if we could do something together as soon as she got off the bus. I said well.......what would you like to do? (never agree to anything with her until you are sure of the expectations...lol! I wouldn't want to agree to working on head stands! lol!!!) She looked up at me, sweet as could be, and said.....can we just sit down and have a little drink together?? Really???? It means something to her that I actually sit with her and have a drink?? So, I had to agree to those terms :) So - I made us some lemonade to drink.....and those who really know me know that giving her lemonade is a real treat! I am a strictly milk and water for her mommy.......chocolate milk on special occassions only..... lol!
I spent the beginning of the week cutting and sorting and packaging up the ribbon shares - thank you very much if you ordered one!!! This is my first experience with school....so there are lots of new things in our schedule that weren't there before. I will get back in the swing of life soon - I pinky swear!!!
Wednesday, August 25, 2010
Live, Laugh & Love......
......Love me do! You know I {luv} u!.....I'll always be true......so, pleeeeeeease......Love THIS too!!!
Oh my....with all of the Beetle talk yesterday on a show I was watching about their top 100 songs.....I just could not resist!
****warning!!!! This is a very long post.......
GUESS WHAT?!?!??!
Did you guess yet???
I have a tutorial for you today!!! And a cute card to show you - if I may toot my own horn........lol!
Let's start with the card, shall we?
The starting point for this was a sketch challenge. The area that has my sentiment in it is actually supposed to be a separate panel....but.....I went my own way.....surprised?
I didn't think so! lol!!!
The card base is tempting turquoise. The main panel is whisper white, that I embossed with the square lattice embossing folder....and then there is that area that I didn't emboss.......we'll get to that later in this post :)
The whisper white is matted with old olive. The Island Oasis designer series paper really popped against the whisper white. I layered it with a torn panel of daffodil delight - not afternoon delight.....my head keeps going into song with every paragraph I type.....what in the H$!) is wrong with me????? I have a splitting head ache that I can't take anything for because of another medicine I am on.......maybe the rheumatologist doesn't get it that I need a handful of ibuprofen every now and then!?!?!?!?!???!?!!!!!
Oh - I got off track there a bit, huh? Sorry :)
Here is a closer look at some of the sweet goodness.....
The sentiment is from On Your Birthday. I inked it up with Stampin' Write Markers and used my stamp a ma jig to line it up exactly where I wanted it. I made a "frame" around the sentiment with a rose red stampin' write marker to break up the embossed/not embossed areas. And that cone - Isn't it the sweetest thing you have seen since your morning cereal?? The stamp set Sweet Scoops and the designer series paper, Island Oasis, will be RETIRING at the end of this month......do NOT let these babies slip right past you! The cone was inked up with crumb cake and then I edged it up with soft suede. This is what you get from the second stamping of it without reinking. The ice cream is also the second stamping of peach parfait edged up with tangerine tango. And the dazzling diamonds just adds the right amount of pizzazz to it, don't you think? Boy - I sure am big headed today, uh???? And then an accent of a bright button tied with white crochet thread off sets the cone a bit.
And then there is the inside to deal with......
Simple, but enough to add a cohesive feel to the card.
ALL RIGHT ALREADY!!!! I will get to the tutorial now.......
Here is what you will need to gather up: big shot, embossing folder, one cutting plate, the multipurpose platform, a piece of longboard chipboard, cutting mat, hobby blade, ruler, pen....and of course a piece of card stock.
First, cut a piece of longboard chipboard to 4 1/4 x 5 1/2. (this will create a template that is the same size as a card front, making it easier to line up)
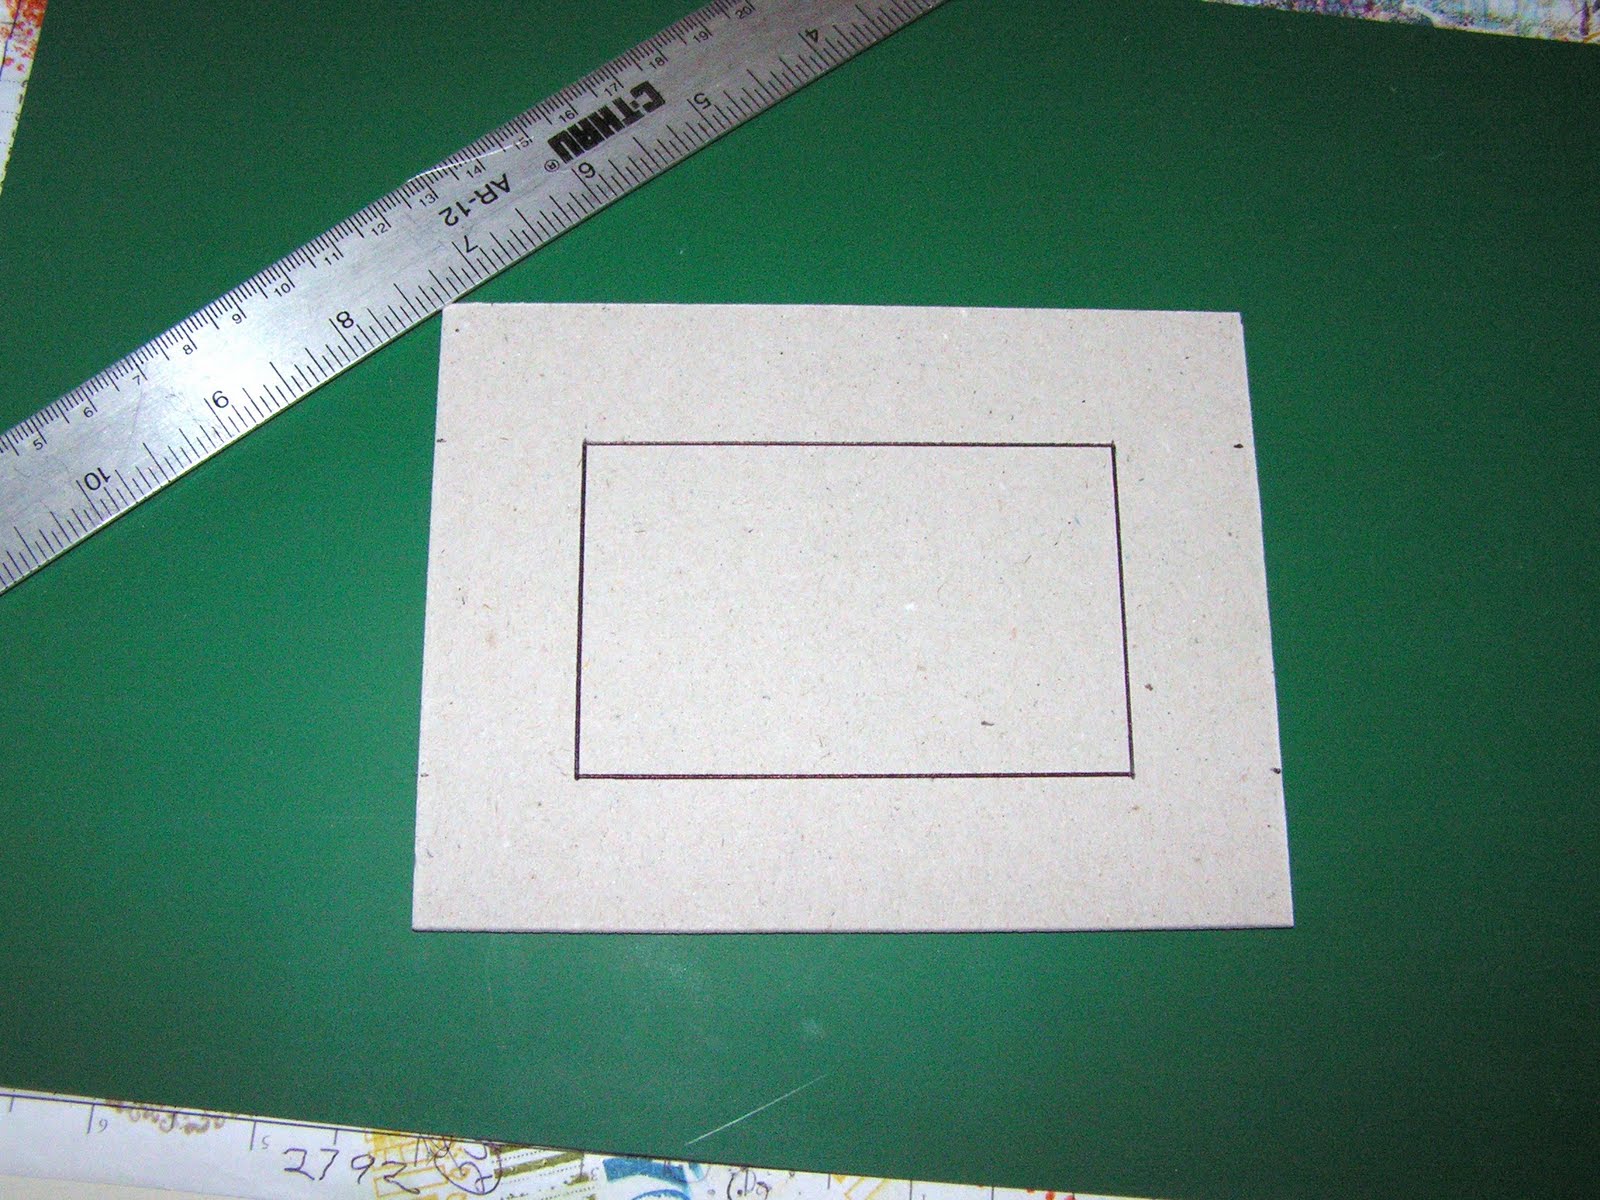
Second, draw out a window in the center of the chipboard piece. (I made a rectangle one inch smaller than the template - being careful to center it)
Third, cut out the window with your hobby blade. And do not throw this piece of chipboard away - you will be able to use it for something else :)
Oh my....with all of the Beetle talk yesterday on a show I was watching about their top 100 songs.....I just could not resist!
****warning!!!! This is a very long post.......
GUESS WHAT?!?!??!
Did you guess yet???
I have a tutorial for you today!!! And a cute card to show you - if I may toot my own horn........lol!
Let's start with the card, shall we?
The starting point for this was a sketch challenge. The area that has my sentiment in it is actually supposed to be a separate panel....but.....I went my own way.....surprised?
I didn't think so! lol!!!
The card base is tempting turquoise. The main panel is whisper white, that I embossed with the square lattice embossing folder....and then there is that area that I didn't emboss.......we'll get to that later in this post :)
The whisper white is matted with old olive. The Island Oasis designer series paper really popped against the whisper white. I layered it with a torn panel of daffodil delight - not afternoon delight.....my head keeps going into song with every paragraph I type.....what in the H$!) is wrong with me????? I have a splitting head ache that I can't take anything for because of another medicine I am on.......maybe the rheumatologist doesn't get it that I need a handful of ibuprofen every now and then!?!?!?!?!???!?!!!!!
Oh - I got off track there a bit, huh? Sorry :)
Here is a closer look at some of the sweet goodness.....
The sentiment is from On Your Birthday. I inked it up with Stampin' Write Markers and used my stamp a ma jig to line it up exactly where I wanted it. I made a "frame" around the sentiment with a rose red stampin' write marker to break up the embossed/not embossed areas. And that cone - Isn't it the sweetest thing you have seen since your morning cereal?? The stamp set Sweet Scoops and the designer series paper, Island Oasis, will be RETIRING at the end of this month......do NOT let these babies slip right past you! The cone was inked up with crumb cake and then I edged it up with soft suede. This is what you get from the second stamping of it without reinking. The ice cream is also the second stamping of peach parfait edged up with tangerine tango. And the dazzling diamonds just adds the right amount of pizzazz to it, don't you think? Boy - I sure am big headed today, uh???? And then an accent of a bright button tied with white crochet thread off sets the cone a bit.
And then there is the inside to deal with......
Simple, but enough to add a cohesive feel to the card.
ALL RIGHT ALREADY!!!! I will get to the tutorial now.......
Here is what you will need to gather up: big shot, embossing folder, one cutting plate, the multipurpose platform, a piece of longboard chipboard, cutting mat, hobby blade, ruler, pen....and of course a piece of card stock.
First, cut a piece of longboard chipboard to 4 1/4 x 5 1/2. (this will create a template that is the same size as a card front, making it easier to line up)
Second, draw out a window in the center of the chipboard piece. (I made a rectangle one inch smaller than the template - being careful to center it)
Third, cut out the window with your hobby blade. And do not throw this piece of chipboard away - you will be able to use it for something else :)
Now what is cool about this embossing template is you can lay your stamps in the window to see how they will fit :)
Now you are ready to be a big shot!!! {hit me with your big shot......come on - hit me with you big shot......} - told you!!
The sandwich layer from bottom to top is:
multipurpose platform on tab 2 (nothing open) - chipboard template - embossing folder with card stock in it, centered onto the chipboard template - cutting plate.
Run that baby through the big shot and you get this!!!!
Well?????? How did I do?
If you liked this tutorial - let me know......leave some love in the comment section.....i won't bite ;)
Tuesday, August 24, 2010
Go Bold....or Go Home!
When I was presented with a color challenge of Rich Razzleberry, Pacific Point and Old Olive.....I immediately thought of bold......not "pretty" or "soft".....I mean....bold. So - here is how I interpreted that.....
How did I do? I must say, the picture doesn't give this card justice. I just have not had good luck at the pictures lately. argh!!
I did pretty it up a bit though.....after stamping stamps from Awash with Flowers onto the whisper white, I sprayed it with smooch spritz to glam it up! In real life - it is soooo pretty...yet bold. Does that make sense? lol!! The sentiment is from Perfect Punches. I punched it with the modern label punch. I then made a mat for it with my big shot and the movers and shakers die - I love that thing!!!! I then punched a 1 1/4 inch circle to sandwich it between a basic black wide oval punch. That's a whole lotta punchin'! hehehe!!! I then absolutely had to bling it up with the adhesive rhinestones that Stampin' Up! now offers - THANK YOU STAMPIN' UP!!!! Also...I layered the ribbon. I put two pieces of basic black satin ribbon overlapping to create a backing for the rich razzleberry satin ribbon. See??
Can you see? I'm telling you...my pictures aren't up to par.....
And to finish up my "visual triangle" between the knot, the sentiment I decided to add some more bling-o flanked with basic black punches.
And....bling-o was his name-o!! HAHAHA!!!! I had to throw that in!
How about the inside, folks???
I hope you all have a great day - now go make time to STAMP!!!!
I would love to know what you think....go ahead.....make my day....leave me some lovin' in the comment section :)
How did I do? I must say, the picture doesn't give this card justice. I just have not had good luck at the pictures lately. argh!!
I did pretty it up a bit though.....after stamping stamps from Awash with Flowers onto the whisper white, I sprayed it with smooch spritz to glam it up! In real life - it is soooo pretty...yet bold. Does that make sense? lol!! The sentiment is from Perfect Punches. I punched it with the modern label punch. I then made a mat for it with my big shot and the movers and shakers die - I love that thing!!!! I then punched a 1 1/4 inch circle to sandwich it between a basic black wide oval punch. That's a whole lotta punchin'! hehehe!!! I then absolutely had to bling it up with the adhesive rhinestones that Stampin' Up! now offers - THANK YOU STAMPIN' UP!!!! Also...I layered the ribbon. I put two pieces of basic black satin ribbon overlapping to create a backing for the rich razzleberry satin ribbon. See??
Can you see? I'm telling you...my pictures aren't up to par.....
And to finish up my "visual triangle" between the knot, the sentiment I decided to add some more bling-o flanked with basic black punches.
And....bling-o was his name-o!! HAHAHA!!!! I had to throw that in!
How about the inside, folks???
I hope you all have a great day - now go make time to STAMP!!!!
I would love to know what you think....go ahead.....make my day....leave me some lovin' in the comment section :)
Monday, August 23, 2010
I can see clearly now.......
..the rain is gone..... Sorry - I had to do that!! LOL!!!!
I was determined to get to stamp a card today. d.e.t.e.r.m.i.n.e.d.!! I have been doing a lot of scrappin' lately, but not making cards so much. I really have missed making them....so today was the day I was going to stamp one. So I pulled out the mojo monday sketch for today and immediately I saw an owl. SERIOUSLY - I wouldn't lie about that! Do you want to see the sketch??
Don't you see it???
Really - you don't??
But - I saw it right away! You guys just don't give it a chance.......hmmm........
Well, I will show you what I did anyway. (even though you don't see it!)
Do you see it now? lol!!
I was going to use my very LOVED owl punch and put a cute little guy in the bottom right hand square and I was looking at my shelf....ALL RIGHT!......shelves.....for a sentiment that might inspire me and I saw my very neglected, bought on my very first order of many from the new catalog, not even mounted let alone seen ink yet, Aviary. I totally adore the cages and those birds are absolutely marvelous!! So, I thought....I will put a bird cage in that spot! But I really wanted to texture that background piece......and see the texture through the cage.......
Do you see where my mind takes me?? WINDOW SHEETS BABY!!! Oh yeah - that's what I am talking about!
Let's take a closer look at my caged feathered friend's abode....
too fun, huh?
I stamped the cage onto a window sheet with black staz on ink. (staz on VERY important - regular classic ink will not dry on window sheets....) I set it aside and stamped the owl onto a piece of very vanilla card stock and cut it out and then adhered it to the very vanilla layer. Then I cut out the cage and adhered it to the upper square with a very vanilla brad from the neutrals brads and then rolled up a mini glue dot and adhered the bottom of the cage to the card hiding the glue dot under the cage base.
Come on....do I deserve kudos or what??? Probably - "or what??" lol!!
Naturally I couldn't stop at the card front.......
Seriously, I couldn't stop!!
Here are the goodies I used to put this baby together:
stamps: Aviary
ink: black staz on, pumpkin pie, rose red
card stock: very vanilla, rose red, pumpkin pie, basic black
accessories: big shot, polka dot embossing folder, itty bitty punch pack, 1 1/4 square punch, 1 3/8 square punch, neutrals brads, paper piercer, mat pack, mini glue dots, black satin ribbon, brights designer buttons, crochet thread
give a girl some love....what do you think?
I was determined to get to stamp a card today. d.e.t.e.r.m.i.n.e.d.!! I have been doing a lot of scrappin' lately, but not making cards so much. I really have missed making them....so today was the day I was going to stamp one. So I pulled out the mojo monday sketch for today and immediately I saw an owl. SERIOUSLY - I wouldn't lie about that! Do you want to see the sketch??
Don't you see it???
Really - you don't??
But - I saw it right away! You guys just don't give it a chance.......hmmm........
Well, I will show you what I did anyway. (even though you don't see it!)
Do you see it now? lol!!
I was going to use my very LOVED owl punch and put a cute little guy in the bottom right hand square and I was looking at my shelf....ALL RIGHT!......shelves.....for a sentiment that might inspire me and I saw my very neglected, bought on my very first order of many from the new catalog, not even mounted let alone seen ink yet, Aviary. I totally adore the cages and those birds are absolutely marvelous!! So, I thought....I will put a bird cage in that spot! But I really wanted to texture that background piece......and see the texture through the cage.......
Do you see where my mind takes me?? WINDOW SHEETS BABY!!! Oh yeah - that's what I am talking about!
Let's take a closer look at my caged feathered friend's abode....
too fun, huh?
I stamped the cage onto a window sheet with black staz on ink. (staz on VERY important - regular classic ink will not dry on window sheets....) I set it aside and stamped the owl onto a piece of very vanilla card stock and cut it out and then adhered it to the very vanilla layer. Then I cut out the cage and adhered it to the upper square with a very vanilla brad from the neutrals brads and then rolled up a mini glue dot and adhered the bottom of the cage to the card hiding the glue dot under the cage base.
Come on....do I deserve kudos or what??? Probably - "or what??" lol!!
Naturally I couldn't stop at the card front.......
Seriously, I couldn't stop!!
Here are the goodies I used to put this baby together:
stamps: Aviary
ink: black staz on, pumpkin pie, rose red
card stock: very vanilla, rose red, pumpkin pie, basic black
accessories: big shot, polka dot embossing folder, itty bitty punch pack, 1 1/4 square punch, 1 3/8 square punch, neutrals brads, paper piercer, mat pack, mini glue dots, black satin ribbon, brights designer buttons, crochet thread
give a girl some love....what do you think?
Labels:
big shot,
cards,
challenges,
mojo monday
Thursday, August 19, 2010
feEd mE
Hi All!!!
Where does the time go? HUH??? WHERE?!??!?!?
I have a scrapbook page to share with you today. I have been really working to get some scrapbooking caught up.....notice I said "some" not "all." lol!!! I am so far behind, I don't think I will ever catch up!
Every year, we take our daughter to feed fish at at town Linesville. They have a spillway where carp collect to eat, eat and eat some more! Anyway - our daughter gets a kick out of them flipping around for chunks of bread.
Well, enough carp crap......LOL!!!!!
The colors I used here are chocolate chip, very vanilla, marina mist and baja breeze. I love this color combo!!
My title is chipboard letters that Stampin' Up! retired last catalog and for the life of me, I can't remember what the set is called. But you can get this look but using the new alphabet soup chipboard letter set in the current catalog. Just mix and match your letters - this is a great way to use up letters when you don't have your whole title in one font. I colored them with a sponge dauber and very vanilla craft ink. After they were dry, I sanded the edges with a precision file in the new distressing kit. The layered border above the title is a piece of baja breeze that was punched with the scallop edge punch with a piece of marina mist that was punched with the brand new dotted scallop ribbon border punch and then topped off with a tiny sliver of chocolate chip card stock.
To finish off my photo collage block - I wanted to add some texture and of course, ribbon......duh! {lol} I cut panels of chocolate chip, marina mist and baja breeze and then ran them through the big shot with various texture folders. The chocolate chip is textured with the polka dot folder, the marina mist is accented with elegant lines and the baja breeze is all done up with the manhattan flower folder. I then cut a tiny slit along the photo edge with my hobby blade to feed the 1/8th inch taffeta ribbon through to tie a bow around those panels to soften them up a little :)
Did you notice the brad accents in the lower right hand corner of the picture block???? They are the 5/16th inch brads with brad washers made with the itty bitty punch pack.
well.....that's all folks! I am going to get some work done today...for sure....well, most likely........probably................I hope..............................well - probably not, but it sounded good, right?? LOL!!!
ALL RIGHT .....enough all ready!! get off my back - I'm only one person. I will try to get some work done! hehehe!!
Where does the time go? HUH??? WHERE?!??!?!?
I have a scrapbook page to share with you today. I have been really working to get some scrapbooking caught up.....notice I said "some" not "all." lol!!! I am so far behind, I don't think I will ever catch up!
Every year, we take our daughter to feed fish at at town Linesville. They have a spillway where carp collect to eat, eat and eat some more! Anyway - our daughter gets a kick out of them flipping around for chunks of bread.
Well, enough carp crap......LOL!!!!!
The colors I used here are chocolate chip, very vanilla, marina mist and baja breeze. I love this color combo!!
My title is chipboard letters that Stampin' Up! retired last catalog and for the life of me, I can't remember what the set is called. But you can get this look but using the new alphabet soup chipboard letter set in the current catalog. Just mix and match your letters - this is a great way to use up letters when you don't have your whole title in one font. I colored them with a sponge dauber and very vanilla craft ink. After they were dry, I sanded the edges with a precision file in the new distressing kit. The layered border above the title is a piece of baja breeze that was punched with the scallop edge punch with a piece of marina mist that was punched with the brand new dotted scallop ribbon border punch and then topped off with a tiny sliver of chocolate chip card stock.
To finish off my photo collage block - I wanted to add some texture and of course, ribbon......duh! {lol} I cut panels of chocolate chip, marina mist and baja breeze and then ran them through the big shot with various texture folders. The chocolate chip is textured with the polka dot folder, the marina mist is accented with elegant lines and the baja breeze is all done up with the manhattan flower folder. I then cut a tiny slit along the photo edge with my hobby blade to feed the 1/8th inch taffeta ribbon through to tie a bow around those panels to soften them up a little :)
Did you notice the brad accents in the lower right hand corner of the picture block???? They are the 5/16th inch brads with brad washers made with the itty bitty punch pack.
well.....that's all folks! I am going to get some work done today...for sure....well, most likely........probably................I hope..............................well - probably not, but it sounded good, right?? LOL!!!
ALL RIGHT .....enough all ready!! get off my back - I'm only one person. I will try to get some work done! hehehe!!
Monday, August 16, 2010
Ribbon Shares for You!!!!!
VINTAGE ACCESSORIES SHARE - $18
6 mini Vintage tags
12 vintage trinkets safety pins (4 each of three finishes)
12 vintage trinket button brads (4 each of three finishes)
10 Antique Brads ( 2 of each 5 different designs)
and 2 1/2 yards of BOTH Chantilly and Victoris Lace Ribbon
RIBBON ONLY:
1/2 inch In Color Stitched-Poly Twill - $10.50 for 15 yards!!
Get 3 yards of each 5 In Colors: Blushing Bride, Peach Parfait, Poppy Parade, Concord Crush, and Pear Pizzazz.
1 1/4 inch Striped Grosgrain - $26 for 22 yards
Get 2 yards of each 11 colors: Daffodil Delight, Pumpkin Pie, Pretty in Pink, Real Red, Rich Razzleberry, Night of Navy, Marina Mist, Certainly Celery, Old Olive, Early Espresso, Basic Black
1/8 inch Taffeta Ribbon - $18 for 26 yrads
Get 2 yards of each of the 13 colors: Whisper White, Very Vanilla, Daffodil Delight, Pumpkin Pie, Pretty in Pink, Real Red, Rich Razzleberry, Night of Navy, Marina Mist, Certainly Celery, Old Olive, Early Espresso, Basic Black
3/8 inch Taffeta Ribbon - $21 for 26 yards
Get 2 yards of each of the 13 colors: Whisper White, Very Vanilla, Daffodil Delight, Pumpkin Pie, Pretty in Pink, Real Red, Rich Razzleberry, Night of Navy, Marina Mist, Certainly Celery, Old Olive, Early Espresso, Basic Black
WANT TO GET SOMETHING FREE FOR YOUR ORDER?????
Order one of each of the 4 Ribbon Shares for $75 and not only save the $0.50 but you get to select a FREE roll of 1/4 inch grosgrain for FREE!!!!!!
Orders will be placed in increments of 5 shares.
Shipping rates are additional if needed to be shipped.
Please email (regcorn@zoominternet.net) if interested in a share.
6 mini Vintage tags
12 vintage trinkets safety pins (4 each of three finishes)
12 vintage trinket button brads (4 each of three finishes)
10 Antique Brads ( 2 of each 5 different designs)
and 2 1/2 yards of BOTH Chantilly and Victoris Lace Ribbon
RIBBON ONLY:
1/2 inch In Color Stitched-Poly Twill - $10.50 for 15 yards!!
Get 3 yards of each 5 In Colors: Blushing Bride, Peach Parfait, Poppy Parade, Concord Crush, and Pear Pizzazz.
1 1/4 inch Striped Grosgrain - $26 for 22 yards
Get 2 yards of each 11 colors: Daffodil Delight, Pumpkin Pie, Pretty in Pink, Real Red, Rich Razzleberry, Night of Navy, Marina Mist, Certainly Celery, Old Olive, Early Espresso, Basic Black
1/8 inch Taffeta Ribbon - $18 for 26 yrads
Get 2 yards of each of the 13 colors: Whisper White, Very Vanilla, Daffodil Delight, Pumpkin Pie, Pretty in Pink, Real Red, Rich Razzleberry, Night of Navy, Marina Mist, Certainly Celery, Old Olive, Early Espresso, Basic Black
3/8 inch Taffeta Ribbon - $21 for 26 yards
Get 2 yards of each of the 13 colors: Whisper White, Very Vanilla, Daffodil Delight, Pumpkin Pie, Pretty in Pink, Real Red, Rich Razzleberry, Night of Navy, Marina Mist, Certainly Celery, Old Olive, Early Espresso, Basic Black
WANT TO GET SOMETHING FREE FOR YOUR ORDER?????
Order one of each of the 4 Ribbon Shares for $75 and not only save the $0.50 but you get to select a FREE roll of 1/4 inch grosgrain for FREE!!!!!!
Orders will be placed in increments of 5 shares.
Shipping rates are additional if needed to be shipped.
Please email (regcorn@zoominternet.net) if interested in a share.
Monday, August 9, 2010
It's just another manic monday.......
......ohhhhh....oohhhhh.....ooohhhhhh.....wish it was sunday......oohhhh......oohhhhh....oooohhhhh.....hubby's home that day.......ooohhhh....oohhh...ooohhhh......i could use a "mental health" day.....oohhh...ooohhh....oooohhh...........i didn't get one yesterday.......
LOL!!!!
it just came to me - I had to get it out!
It took me this long to get my Mojo Monday card ready for you.......well - at least it is still Monday, right??? lol!
I have really been neglectful of getting cards out that I need to.....So, I am starting a clean slate today starting with this mojo monday card.
I don't think there is a cuter set than Fox and Friends to make baby cards out of. It is my "go to" set since Stampin' Up! retired my beloved Nursery Necessities :) I also am totally in love with the baby tees wheel, but I used that one last time - so I went back to Fox and Friends :)
I do have a tiny confession though....most of you have probably already caught me! I hear you - you are huffing under your breath and asking " how could she do this to us???" "does she think we don't pay attention to her detail??" So, I will get this off my chest right now - The so saffron designer series paper is from a retired pack, Sweet Pea. I have all of the new designer series patterns....but they were down stairs and I was up stairs......I wasn't leaving my room before I had too! ( I can only send my daughter for so many things.....you know? She can handle a drink for mommy or the phone...but a stack of designer series paper that is on top of the entertainment stand to keep it from her hands to begin with???? I don't think so!)
I get alot of comments from club members that they could never come up with the color combinations that I do themselves. Well - listen here Stampers......I am not a color putting together genius - that is for sure!! I always pull out my color coach or the Idea Book and Catalog. Today's color combination came straight from the Nursery Suite Simply Scrappin' kit. I just omitted regal rose and used early espresso instead of chocolate chip. (another confession......do you see a pattern forming here??? lol!.....my chocolate chip is packed in my bag for club week and I don't like to take things in and out of there. I am afraid I don't put them back - so if I can substitute - I usually do....lol!)
How sweet is that sentiment??? It is from Curly Cute. I used my photo corner punch to edge it out on the ends......if you leave me enough sweet nothin's in my comment section, maybe I can whip up a tutorial for you :)
Oh yeah......You knew I had to throw some brad washers in there, huh? My tutorial for those is HERE. These washers were made with the circle punch from the Itty Bitty Punch Pack instead of the 1/4 inch circle (which is retired, by the way - and wouldn't fit these brads anyway! ).
Well, whisper sweet nothin's in my comment section, I could really use them this week........
I have a scrapbook layout to share with you....I will try to get it up for tomorrow for you.
LOL!!!!
it just came to me - I had to get it out!
It took me this long to get my Mojo Monday card ready for you.......well - at least it is still Monday, right??? lol!
I have really been neglectful of getting cards out that I need to.....So, I am starting a clean slate today starting with this mojo monday card.
I don't think there is a cuter set than Fox and Friends to make baby cards out of. It is my "go to" set since Stampin' Up! retired my beloved Nursery Necessities :) I also am totally in love with the baby tees wheel, but I used that one last time - so I went back to Fox and Friends :)
I do have a tiny confession though....most of you have probably already caught me! I hear you - you are huffing under your breath and asking " how could she do this to us???" "does she think we don't pay attention to her detail??" So, I will get this off my chest right now - The so saffron designer series paper is from a retired pack, Sweet Pea. I have all of the new designer series patterns....but they were down stairs and I was up stairs......I wasn't leaving my room before I had too! ( I can only send my daughter for so many things.....you know? She can handle a drink for mommy or the phone...but a stack of designer series paper that is on top of the entertainment stand to keep it from her hands to begin with???? I don't think so!)
I get alot of comments from club members that they could never come up with the color combinations that I do themselves. Well - listen here Stampers......I am not a color putting together genius - that is for sure!! I always pull out my color coach or the Idea Book and Catalog. Today's color combination came straight from the Nursery Suite Simply Scrappin' kit. I just omitted regal rose and used early espresso instead of chocolate chip. (another confession......do you see a pattern forming here??? lol!.....my chocolate chip is packed in my bag for club week and I don't like to take things in and out of there. I am afraid I don't put them back - so if I can substitute - I usually do....lol!)
How sweet is that sentiment??? It is from Curly Cute. I used my photo corner punch to edge it out on the ends......if you leave me enough sweet nothin's in my comment section, maybe I can whip up a tutorial for you :)
Oh yeah......You knew I had to throw some brad washers in there, huh? My tutorial for those is HERE. These washers were made with the circle punch from the Itty Bitty Punch Pack instead of the 1/4 inch circle (which is retired, by the way - and wouldn't fit these brads anyway! ).
Well, whisper sweet nothin's in my comment section, I could really use them this week........
I have a scrapbook layout to share with you....I will try to get it up for tomorrow for you.
Labels:
baby,
cards,
challenges,
mojo monday
Tuesday, August 3, 2010
Whooooooo hooooooo has seen Regina??
LOL!!!
Sorry it has been SO long! My little one turned five - that means two parties to get ready for. One big party with a hall and the nine and then a little party just for the three of us. She has been in swimming lessons - which it is hard to believe that two hours of swimming could throw me off so much! lol!! Well - maybe it isn't that hard???? Anyway......I have come back today with two posts in one. Does that make up for anything?? I sure hope so. I will be posting more regularly, I pinkie swear!
I have this weeks Mojo Monday sketch card to share with you. I have been itching to get together with the new owl punch since it arrived at my door step. So, here is what I came up with:
Aren't those little owls adorable???? If you haven't ordered this punch yet - you really do need it!! The owls are super sweet, not to mention the sizes of circles that are included with the punch!!
The card base is pear pizzazz. The designer series paper is from Sunny Garden. The ribbon is the new 1/2 inch stitched poly ribbon in pear pizzazz. {luv} that new ribbon!!! The scallop circle behind the cutie owls is also new, it is the extra large 2 3/8 scallop circle. The sentiment is from the Summer mini, In a Word. I think this will be my anniversary card for my hubby. I punched the branches out with the extra large two step bird punch.
Did you see the brads in the upper left corner??? The white punches were punched out with a punch from the itty bitty shapes punch pack made into brad washers using my TUTORIAL HERE. I then adhered them down with brand new neutrals brads after I aligned up the holes with the mat pack and paper piercer.
Those owls are cute, I don't care who you are....that's cute right there. That was a quote from Larry the Cable Guy....well - he would have made that quote if he had seen these owls!! lol!
the bodies are soft suede. The bellies are from Sunny Garden. I added white gel pen accents to the eyes to brighten them up a little :)
ALL RIGHT.......Now I have a Tipsy Tuesday for you!
Are your ribbon spools out of control? Mine sure were!! So I bought a bunch of Stampin' Up!'s ribbon keepers and then, my mom gave me hers because they weren't working for her. (mom- you will be sorry you gave yours up when you see this tipsy tuesday :) ) The problem I had was I didn't have a lot of table space for them....so I had to stack them - high. Well....high stacks of ribbon keepers really aren't conducive to my desk area - if you know what I mean ;)
One day, I was sitting at my desk working or sorting or something.....and I had a HUGE duh! moment.
Let me back up a moment....My towers of ribbon keepers kept falling over on my desk, so I had tied them up to a nail in the wall, but still sitting on my desk. Ok....fast forward back to my duh! moment.... I looked over at my stamp shelf behind my door and the music began to play a light was shining on the wall behind my door......are you picturing it??? And I thought....if I have these ribbon keepers hanging on my desk....why couldn't I hang them there???? So I did this:
Don't look at the fact that the two strips of ribbon keepers do not line up - I was so excited, I just pounded nails and tied a couple of ribbons!!! My retired ribbon is on the right and my current ribbon is on the left....I KNOW!!! I have a slight ribbon hoarding problem......It isn't that I really "hoard" it per say.....because I do use it......I just buy soooo much of it. lol!!! And don't even say a word about the tote of retired ribbon here:
LOL!!!
Let me know what you think of the card and my storage solution......and maybe there is a number for a ribbon rehab in beverly hills you could refer me too ;)
Sorry it has been SO long! My little one turned five - that means two parties to get ready for. One big party with a hall and the nine and then a little party just for the three of us. She has been in swimming lessons - which it is hard to believe that two hours of swimming could throw me off so much! lol!! Well - maybe it isn't that hard???? Anyway......I have come back today with two posts in one. Does that make up for anything?? I sure hope so. I will be posting more regularly, I pinkie swear!
I have this weeks Mojo Monday sketch card to share with you. I have been itching to get together with the new owl punch since it arrived at my door step. So, here is what I came up with:
Aren't those little owls adorable???? If you haven't ordered this punch yet - you really do need it!! The owls are super sweet, not to mention the sizes of circles that are included with the punch!!
The card base is pear pizzazz. The designer series paper is from Sunny Garden. The ribbon is the new 1/2 inch stitched poly ribbon in pear pizzazz. {luv} that new ribbon!!! The scallop circle behind the cutie owls is also new, it is the extra large 2 3/8 scallop circle. The sentiment is from the Summer mini, In a Word. I think this will be my anniversary card for my hubby. I punched the branches out with the extra large two step bird punch.
Did you see the brads in the upper left corner??? The white punches were punched out with a punch from the itty bitty shapes punch pack made into brad washers using my TUTORIAL HERE. I then adhered them down with brand new neutrals brads after I aligned up the holes with the mat pack and paper piercer.
Those owls are cute, I don't care who you are....that's cute right there. That was a quote from Larry the Cable Guy....well - he would have made that quote if he had seen these owls!! lol!
the bodies are soft suede. The bellies are from Sunny Garden. I added white gel pen accents to the eyes to brighten them up a little :)
ALL RIGHT.......Now I have a Tipsy Tuesday for you!
Are your ribbon spools out of control? Mine sure were!! So I bought a bunch of Stampin' Up!'s ribbon keepers and then, my mom gave me hers because they weren't working for her. (mom- you will be sorry you gave yours up when you see this tipsy tuesday :) ) The problem I had was I didn't have a lot of table space for them....so I had to stack them - high. Well....high stacks of ribbon keepers really aren't conducive to my desk area - if you know what I mean ;)
One day, I was sitting at my desk working or sorting or something.....and I had a HUGE duh! moment.
Let me back up a moment....My towers of ribbon keepers kept falling over on my desk, so I had tied them up to a nail in the wall, but still sitting on my desk. Ok....fast forward back to my duh! moment.... I looked over at my stamp shelf behind my door and the music began to play a light was shining on the wall behind my door......are you picturing it??? And I thought....if I have these ribbon keepers hanging on my desk....why couldn't I hang them there???? So I did this:
Don't look at the fact that the two strips of ribbon keepers do not line up - I was so excited, I just pounded nails and tied a couple of ribbons!!! My retired ribbon is on the right and my current ribbon is on the left....I KNOW!!! I have a slight ribbon hoarding problem......It isn't that I really "hoard" it per say.....because I do use it......I just buy soooo much of it. lol!!! And don't even say a word about the tote of retired ribbon here:
LOL!!!
Let me know what you think of the card and my storage solution......and maybe there is a number for a ribbon rehab in beverly hills you could refer me too ;)
Labels:
cards,
challenges,
mojo monday,
punch art,
tips,
tipsy tiesday
Tuesday, July 20, 2010
How much is the Mojo in the window.....
......the one with the beautiful cards??? How much is that mojo in the window.....i sure hope that mojo's FOR SALE!!!!
maybe i should put my mojo up for sale????
This happens to me everytime i make huge Stampin' Up! purchases.......I lose my mojo! I get my new stuff and just pine over it......picking it up.....moving it around......just loving every bit of it......but not creating with it! New stuff usually gets mojo going....not me....I go into stand still mode...like I don't want to get it dirty or use it up. HELLO!!!!! The consumables can be replaced!! What is up with me?? Maybe i have too much to think about......who knows??? I do know that my daughter's fifth birthday party is this weekend and I have scaled things back.....big time!! So, that is on my mind....worrying that I am not doing enough. Not cooking enough......not making enough....not creating enough..... I just need to take a big nap until Friday - whenI beging to bake the cakes.....yes, cakeS. lol!!!
Enough whining, huh? lol! I went to check today's color challenge....that would get me going right??? Well, it is regal rose, old olive, and peach parfait. Hmmm........So - flowers were in order, right?? well- here is what I came up with:
Please don't throw stones at me.......now that I see it - I am going to remove the flower in the upper right hand corner. So how does it look now???? Ahhhhh....much better!
The card base is old olive and i embossed it with the new elegant lines embossing folder and my big shot. ooooo....pretty....... The ribbon is the peach pizzazz 1/2 inch stitched poly ribbon. {luv} that! The sentiment panel is die cut with the matchbox XL die and stamped with the sentiment from In a Word from the Summer Mini. It was inked up with stampin' write markers. The background die is also from the matchbox die. I cut it in regal rose and sponged it with old olive. The flowers are from Growing Green. I used the color flood technique on them. The roses are regal rose and the small flower are peach parfait.
I will show them closer to you - even though they are coming off of the card!
The small flower centers are from the brand new adhesive backed pearls!!!! Thank goodness we now have these!!!!
Well.....I would love to get some feedback from you - leave me a comment below to help me get my mojo back :)
maybe i should put my mojo up for sale????
This happens to me everytime i make huge Stampin' Up! purchases.......I lose my mojo! I get my new stuff and just pine over it......picking it up.....moving it around......just loving every bit of it......but not creating with it! New stuff usually gets mojo going....not me....I go into stand still mode...like I don't want to get it dirty or use it up. HELLO!!!!! The consumables can be replaced!! What is up with me?? Maybe i have too much to think about......who knows??? I do know that my daughter's fifth birthday party is this weekend and I have scaled things back.....big time!! So, that is on my mind....worrying that I am not doing enough. Not cooking enough......not making enough....not creating enough..... I just need to take a big nap until Friday - whenI beging to bake the cakes.....yes, cakeS. lol!!!
Enough whining, huh? lol! I went to check today's color challenge....that would get me going right??? Well, it is regal rose, old olive, and peach parfait. Hmmm........So - flowers were in order, right?? well- here is what I came up with:
Please don't throw stones at me.......now that I see it - I am going to remove the flower in the upper right hand corner. So how does it look now???? Ahhhhh....much better!
The card base is old olive and i embossed it with the new elegant lines embossing folder and my big shot. ooooo....pretty....... The ribbon is the peach pizzazz 1/2 inch stitched poly ribbon. {luv} that! The sentiment panel is die cut with the matchbox XL die and stamped with the sentiment from In a Word from the Summer Mini. It was inked up with stampin' write markers. The background die is also from the matchbox die. I cut it in regal rose and sponged it with old olive. The flowers are from Growing Green. I used the color flood technique on them. The roses are regal rose and the small flower are peach parfait.
I will show them closer to you - even though they are coming off of the card!
The small flower centers are from the brand new adhesive backed pearls!!!! Thank goodness we now have these!!!!
Well.....I would love to get some feedback from you - leave me a comment below to help me get my mojo back :)
Labels:
big shot,
cards,
challenges,
sympathy
Subscribe to:
Posts (Atom)