Monday, September 22, 2008

It has been a long time.....

Sorry I have been gone for so long! I sure missed being here! Finally got the computer fixed...and then headed into a busy weekend. Speaking of weekends....I had a stamp camp on Sunday, which was a blast! But that isn't why I'm here. I came to show you the door prize.....

Isn't it cute??

It isn't my original idea...It came from a fellow blogger, Sheryl.
It came full of green goodies....punched shapes, buttons, rhinestone brads, eyelets and ribbon.

See the bird on top...it is also a die for your Big Shot....I tell you...the Big Shot makes your projects come together so fast!!!!
Oh yeah....Big Shot Club Members...this will be one of your projects next club. (It won't be this same exact design or color...but none the less, you will learn this box.)

Tuesday, September 16, 2008

It's been a VERY long week so far......

I'm sorry if you have been wondering what has happened to me.....maybe you don't give two hot dogs here I've been....but I will fill you in anyway.

Well....first of all...it ll started when Ike plowed through western Pa with very powerful winds....Sunday evening. We all sat down to watch the Steeler game....HELLO....they are playing the Browns.....what else would we have been doing????? The wind started to really pick up.....trees blowing like crazy....winds howling through here like we lived near the ocean....you get the picture, right? lol!!!! Just a few minutes into the game....he lights dimmed several times...like a horror picture, lol!!! I ran towards my computer to try to get it shut off before the electric went out for good. I didn't make it...not even close.... :-( (note - the last time we had one of these power surges, my computer bit the dust and I had to restore it back to factory settings. Let me tell you...I lost so many files...so much information....so I didn't wan tis to happen again!!!!)

So, the lights went out.....we did get power restored Monday afternoon around 2:00, but I had left Monday and Tuesday with my daughter to camp (previously planned....thank goodness!!!). The second my hubby answered the phone on Monday night...I sent him right to the computer....he knows nothing about 'puters so I was grabbin' at straws here. He couldn't get it to turn on.....my heart sank! I can't be disconnected.....these aren't the pony express days here.....lol!

So fast forward...I come home Tuesday to give the power button a try myself....maybe he was pushing a disk eject button, right??? lol!! Well....nothing!! Didn't my computer recognize my touch???? I am in panic mode now.....

I call a computer repair lady...she can't even look at my poor 'puter until Thursday night....WHAT????!?!?! Thursday night??? What can I do....Hubby is NOT going to agree to another one before someone looks at it...I can tell you that right now.....So what is a girl to do??? Beg to borrow a spare computer....that is what a girl is to do!!!! LOL!!! So, here I sit...n borrowed notebook trying to let you know where I have been......So, I don't know if I will get to upload any pictures for you.....

And if you have emailed me the last three days.....I am not ignoring you....I can't get to you....I will try to check my email through this computer...argh!!!!!

Did I mention that the torque converter needed replaced in my car...that I have ad since this April this week too??!?!?!! A girl needs a break here........lol!!!

Happy Stampin' everyone!!!

Thursday, September 11, 2008

Take a moment to remember....

Click on this link to watch a small video on September 11, 2001.

Chilling....it is hard to remember life before it.

It is hard to believe that life as we know it was for ever changed between 8:45 am - 10:10 am by 4 airplanes filled with innocent passengers and a hand full of terrorists. So many lives lost here, on our American soil, senselessly.

Even though the video focuses on New York City....take a moment to remember The Pentagon and the heroes that brought down another terrorist plane right here in Pennsylvania.

I have really been reflecting on his lately. My daughter had a play date this past Monday in honor of September 11th. Now, she wasn't even born when it occurred but I want her to understand the impact it had on our country, when she is old enough to grasp it. Her play date was to cut things out of a magazine and glue down to resemble a flag. She isn't near old enough to even "get" that - she just turned 3 but it was important to me that she actually glued in a flag pattern. I will scrapbook that for her along with journaling about September 11th. I think that sometimes scrap book shouldn't just be filled with happy...it needs to be filled with "life" And that one day has changed our lives in more ways than we will probably ever realize.

Sorry to be so "heavy" this morning.....

Wednesday, September 10, 2008

Stampin' Up! and Country Living Magazine!!!!

ETA: PLEASE BE SURE TO READ ALL FINE PRINT. AT THE BOTTOM OF THE SUBSCRIBE PAGE, THERE IS A $1.33 PER ISSUE HANDLING FEE. I DON'T WANT ANYONE TO HAVE ANY SURPRISES TO THEIR BILL.

Last year Stampin' Up! offered a limited edition stamp set bundle partnering up with Country Living Magazine. They have done it again!!! Stampin' Up! will offer an eight page spread in Country Living Magazine featuring the Country Living Holiday Collection Stampin' Kit in the December 2008 issue.


What does this mean for you? A couple of things:


1. You will be able to purchase your exclusive kit directly from me.

2. As a customer, Country Living is offering a subscription special!!! You can get a year's worth of Country Living magazines for only $12!!!!! That is 75% off the new stand price! AND.....on top of the low subscription rate, you will receive an exclusive Stampin' Up! note card set, just for subscribing....from Country Living!!! How great is this?????


CLICK HERE to subscribe.


You can enjoy This magazine subscription all year...delivered right to your door! And get a mini stamp set...free....just as a thank you gift from Country Living Magazine!!

Tuesday, September 9, 2008

A gift for my Big Shot club members...and a tutorial for you! :)

Hi everyone!!!
I have 2 Big Shot clubs going simultaneously right now and I wanted to make them a gift using the big shot for our first meeting. I had thought that several of them didn't have experience with a die cutting system....so I thought a note pad was in order. I was originally going to alter a small tablet with dies in the Big Shot....but then, it hit me....why not make the tablet????

These were super fun to make!! The cover is old olive. I stamped the flowers from Pocket Silhouettes - on sale this month....contact me right away to place your order - first with old olive and then the top flower with whisper white craft ink. I left the covers dry over night. I could have dried them with a heat tool, but it was evening...so I thought just leave them sit over night.... The sentiments "Thank You" is from Fresh Cuts. I stamped that in elegant eggplant and punched it out with the large oval punch. I gave it a mat with an elegant eggplant oval punched with the brand new wide oval. Then placed a small accent flower on the side with a more mustard flower from three for you punch. Adhered that with a brad from the vintage brads set. Wanna see it up close?

The front and back covers were made with one pass through the big shot. It cut through two layers of card stock like butter!!! I then cut five sheets of printer paper at a time to create the pages....again...like butter.

To get the pages all cut even, I lined up the top and bottom notch at the two inch mark on my table top trimmer and cut off all of the ends. Your ends will look like this:


Next, I stacked my cover, 20 pages and back cover in little piles. And then I though to myself....what if I don't punch the holes in a perfectly straight line and the tablet is a willy-wonkus??? ( Those aren't the exact words I thought...but you get the picture....lol!!!)

So I made a template out of a piece of the tablet paper. I folded it in half long ways and punched a hole. That way, I could use that as a template and I knew the holes were in line. If I had a home binding system, I wouldn't have had to go through that last step...but I don't. I would rather spend that money on big shot stuff or stamps :):):) Here is what the template looked like:


I placed that template on top of each tablet stack and punched the holes with my crop-a-dile...again...the crop-a-dile went through the entire tablet at once, with no trouble!!! Stampin' Up! must get it that we stampers need tools that can do more than one little sheet of paper at a time....thanks Stampin' Up!!!!

I bound them together with little o rings and accented that with olive, mustard and eggplant ribbons. A girl can never "over ribbon" anything.....

Leave me a comment and let me know what you think about these little note pads.

Sunday, September 7, 2008

You won't want to miss this Stamp Camp!

NOTE: This will remain up at the top of the blog until the registration deadline, so please scroll down for current posts!

This is gonna be a fun one!!!

You decide...keep this for yourself or get a jump start on your Holiday Shopping by creating a one of a kind, handmade gift for someone special!

We will be constructing a box to hold all types of cards - all occasion regular sized cards, mini cards with scalloped envelopes, love notes, gift tags, and a stamp envelope! You will have everything you need right in this one place to send a greeting or for gift giving!


Note: mine isn't totally complete, I'm still waiting for suppiles to arrive to complete.

You will be using the Big Shot and exclusive dies and using lots of different types of embellishments! Those embellishments include: hodgepodge hardware, buttons, punches, new ribbons, new designer series papers and more!!!!

The Stamp Camp will be Sunday September 21st at 1:00 pm in the Big Mac Board Room.

THIS CAMP WILL BE VERY LIMITED SO DON'T DELAY IN RESERVING YOUR SPOT.

You can choose the option of predominantly Baja Breeze, shown here, or Kiwi Kiss for your gift set!

The cost of this camp is only $30. RSVP by September 7th.

Email me directly, regcorn@zoominternet.net, to reserve your spot or order your kit for this camp!

***Unable to attend, opt for "Class to Go." You will get all of the consumable supplies, except adhesives, that you need to complete the entire gift set at your convenience. Cost for Class to go is $30 plus $5.25 priority shipping with delivery confirmation. If you are local....great! You can save on shipping. The stamp sets we will be using is Upsey Daisy and Stem Silhouettes, they are both on the Never Seen Before Sale - Add them to your class order and be ready to assemble right away!

Friday, September 5, 2008

Blogger's Challenge - week 62

Hey stampers! I hope you all have been enjoying the new In Colors this year...I sure have! When this week's Blogger's Challenge was a color challenge to use tangerine tango, pacific point, kiwi kiss and riding hood red.....a retro feel jumped out at me. I knew right away that I wanted to use Wow Flowers. I really love this 4 stamp set....now if Stampin' Up! would give us a matching punch to the retro flower image....ah...a girl can dream, right?

I stamped the flower in all four colors onto very vanilla in a random pattern and mounted that onto kiwi kiss. Then a simple knot was tied around those layers with the new riding hood red 5/8th inch striped ribbon. {luv this new ribbon!!!!} I mounted that panel with stampin dimensionals onto my tangerine tango card base.

The sentiment stack was fun to layer, that's for sure....you know how I love my punches and now my Big Shot.....Yep...you read right, my Big Shot. Didn't you see where I used my Big Shot in the stack? Well, let's look closer.....

See the pacific point embossed scalloped circle??? That is a new limited edition sizzix embosslit available for Stampin' Up's 20th anniversary. It has 20 Years embossed in the center. Here is what it looks like...before you stack it up.....

I'm not sure if this will be available for customers to purchase or not, but I just got mine yesterday...so I had to play. I had to use my Big Shot, right??? I am telling you....I can't stop. You will see.....when you get yours...you won't be able to either. Anyway....it cuts and embosses in one pass through the Big Shot!!! How great is this?????? Ok....Stampin' Up!, here is your opportunity to listen to little 'ol me....we want more of these!!! How awesome would it be to get an oval embosslit that coordinates with our oval punches??? ah....me still dreaming.....

Oh...you came here to read about the card...not listen to me dream out loud....It's 5:30 in the morning...bear with me ;)

The center sentiment was stamped twice, once in tangerine tango and once in riding hood red. I punched the tangerine one with a 1" circle punch and then the flower center with the boho blossom punch....that is right....the flower is a perfect fit to the boho blossom punch....don't believe me...scroll back up and see. I'm sure Stampin' Up! has noooo idea that the flower and punch coordinate.....I'm sure that was "my" finding.....LOL!!!! But I was impressed to "figure" it out, none the less... :)

I adhered those two layers together with a clear rhinestone brad from the pretties kit. That layer was adhered with stampin dimensionals onto a 1 1/4 circle of kiwi kiss and a 1 3/8 circle of red riding hood red and then onto that gorgeous pacific point scalloped, embossed circle. I Mounted that entire stack onto stampin' dimensionals and called it a day!

This layout came together so quickly....I made another card with it...but that will be another day :)

Wednesday, September 3, 2008

Stampin' Up! has done it again!!!

I am in awe over my newest shipment from Stampin' Up!

My doctor's bag for the Big Shot has been on back order until this past week....so today....I get mine! I immediately ripped the box open...and what do I find????

Isn't this beautiful???


I thought it was just a black and white plaid bag....so needless to say, I was ecstatic to see the actual fabric! Beautiful grey and black plaid with a tiny strip of pink plaid throughout! Oh my!!!


Isn't this fabric so pretty?


So I decided to unzip it and have a look inside.....OH MY GOSH!!!!!! Are you kidding me????


Gorgeous pink interior outfitted with black and grey tiny polka dots!!! Doe sit get any better????


It sure does! There are interior pockets as well as two large pockets that zipper closed along the outside on the front and back!

If you are getting yourself one of these hot Big Shots I highly recommend the bag. It will be a great place to store your big shot while you aren't using it. And who doesn't want a super stylish bag- one that has a purpose - in your craft space??? I am so glad I ordered mine!

It's a Girl!

Hi Stampers!!!

What I am about to show you might shock you! I mean, when you see it and gasp with shock...don't say I didn't warn you! To be totally honest...I shocked myself! lol!

This card was made to coordinate with the baby gift I posted last Friday. The card also uses today's SCS sketch challenge. Shocked yet? no? Well...give me a minute....

Wanna see it?


Look at the ribbon treatment up close...really added a feminine touch, I think.


Still nothing shocking?

Really?

The fact that I didn't use my Big Shot didn't put you back in your seat? It did me! ;)

Also....Hostess Club girls....there is something new on this card that you will be learning this month! {hint, hint} hehe!


recipe:
stamps: nursery necessities
ink:regal rose, pink pirouette, stampin write markers: so saffron, certainly celery, regal rose
card stock: pink pirouette, whisper white, certainly celery, regal rose, just delightful simply scrappin' kit (retired)
accessories: non stampin up ribbon, scallop edge punch, stampin dimensionals, 1/8 inch hand held punch

Tuesday, September 2, 2008

Big Shot Club Offering

NOTE: This will remain at the top of my blog - Scroll down for current posts!!!

Are you wanting to own a Big shot and accessories but don't want to make a large one time payment purchase? This will be the club for you!


Click HERE to view the Big Shot flyer. These same pages will be in the Holiday Mini Catalog that begins in October, but you are able to begin purchasing the Big Shot and accessories in September!!!! How awesome is that???
The Big Shot is the only die cutting machine you will need! It will cut other dies that you currently own! I will personally train you with the Big Shot that you purchase from me!


How does it work?

Each club will have four members in it. We will meet once a month ( September - December) to make new projects with the Big Shot, if you choose to. I know everyone is busy, so if a meeting time isn't good for everyone, I can email directions for each project to you instead.


BIG SHOT CLUB: $60 per month (for four months)
Special Edition Starter kit including:
- Big Shot
- Multipurpose Platform & Cutting pads
- 2 SU! exclusive Bigz Dies: Scalloped Envelope & Top Note
- 1 SU! exclusive Sizzlet - 4 pack: Birds and Blooms
- 1 SU! exclusive decorative strip: Join the Cheer
- Decorative strip cutting pads & extended spacer platform (necessary to cut long thin dies such as Join the Cheer)


AND
-Your choice of Sizzlet Die (4.95 value) - A Gift from me!
-$20 in free merchandise to spend in the new catalog or on another Big Shot die!
-a Level 1 hostess Stamp set out of the new catalog!


Be one of the first 2 of 4 to sign up for each club and receive an additional Sizzlet Die for free!!!


Please email me if you have any questions.

Today is THE day....

Officially today, you can order your Big Shot! If you want to get a jump start on orders, contact me right away to order your very own Big Shot!

I have several girls that will be attending my first of four consecutive Big Shot clubs/classes. I thought it would be nice to give them a little teaser of a project that they will be making on Sunday. If you are interested in joining our club, we have local club member spots available as well as long distance spots. Email me directly (regcorn@zoominternet.net)


I have had this card in my mind for a while now for our first Big Shot Club meeting but was unsure of the color scheme that I wanted to execute it in. Along came SCS color challenge to do a monochromatic card....I thought..PERFECT! I snuck upstairs to my little oasis and got busy!


I can't give too many details away just yet...I want my Big Shot Club members to get them first hand...but check out the dimension of those flowers ( flower layers bigz die)...and that yummy riding hood taffeta ribbon....oh my!!! And the pretties kit flat back pearls....the softness of pink pirouette.....the beauty of Bella Blossom designer series papers.....when will it end?!??!?!? I don't want it to ever end....Keep up the GREAT work Stampin' Up! I am lovin' it! ;)

Now, GO STAMP! ;)

Friday, August 29, 2008

Sweet little baby girl!!!

This week's Blogger's Challenge was either to do a patriotic card or a baby card....it's Labor Day weekend...get it? hehehe!!

I had a very long over due baby gift to get made for a friend of the family that had her baby in the beginning of June.....and I just now got her gift made!!! ARGH!!!!! My summer has consumed me. I did get to see her though.....what a beauty!! She is so precious! Want to know what the best part of not having her gift done when I got to see her the first time...I'll get to see her again!!! So Grandma of Alexis.....If you are reading this....don't look if you don't want to see it here first! lol!!!


And those of you who will cringe at the sight of a little non Stampin Up ribbons and retired Stampin Up designer series paper...I apologize....I did make up for it by using the BIG SHOT!!!!
The tin was covered in printed paper from a retired Sell-A-Bration simply scrapping kit, Just Delightful. I absolutely love the patterned paper in this kit!!! I think it is gorgeous!

The name tag on the front was made with the exclusive top note die for the Big Shot. I cut it out twice, once in pink pirouette and once in whisper white. I cut the perforated edge off of the whisper white to create a mat with pink pirouette. I then used my ABC Alphabet Lower stamp set and aligned her name with the stamp a ma jig using regal rose ink. Sweet....simple...baby love. I accented that with a moon and star from Nursery Necessities. The star was inked with so saffron and punched with the large star punch. The moon was stamped with pink pirouette and cut out. I mounted it up on stampin dimensionals. I then cut a slit in my name panel to thread ribbon through it and around the can. I used my hobby blade and cutting mat for this. I had these ribbons in my stash and they matched perfectly!!! So soft......

The "lollipops" were accented with Nursery Necessities as well. I really love this stamp set!!!

Now for the lid of the memory can:


If you can't read it on the picture, it reads:

Baby books are great ideas
But sometimes life gets busy.
Living with a little one
Can put you in a tizzy.
Milestones pass too fast at times
To find the proper page.
So, jot a note of each event
With date and baby's age like
"Took three steps on May 10,
or Teething in December."
Drop the note in this memory can
so you're sure to remember!

This isn't my original writing...{blush}....I found it online and have no idea the original creator.

I printed it out accented it with 1 inch circle punches of pink pirouette.
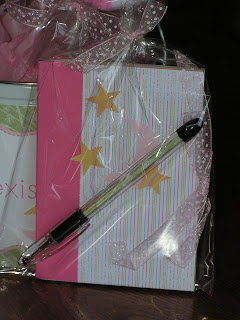

And for the "notes".....I covered a journal. It was covered with patterned paper from the same simply scrappin' kit. I accented it with a moon from Nursery Necessities and stars punched with the star punch in regal rose.

I sure hope Alexis's mommy can put this to good use....I should have made myself one. I thought I could at least keep up with my daughter's scrapbook...but sure enough...I'm behind! lol!!!

Let me know what you think....Happy Labor Day weekend everyone!!!

Thursday, August 28, 2008

I'm crazy about....

....CUPCAKES!!!!!!

When I first saw the stamp set, Crazy for Cupcakes, in the new Idea Book and Catalog....I knew it would be mine...on my first order!!! I have been waiting for Stampin' Up! to give us a really awesome line art cupcake set. You know what??? They didn't even ask me! lol!!! They must have known.....

Well...Kristina has issued another color challenge {#20}...and as soon as I saw the colors...I thought....CUPCAKE!!!!!!

Now I have a stack on my desk of unmounted stamps that I won't even go into....it is embarrassing how many I have sitting unmounted....ininked.....all lonely!!! Actually, I have a stack on my desk...on my floor....in a box....with a fox....( this is starting to sound like a Dr. Suess book )....I don't really have them with a fox...but the other locations are legit! You get the picture....lol!!! Anyway...with all these brand spankin new sets laying around...I just had to use my new Crazy for Cupcakes! And thank you Stampin' Up!....the new ones are all die cut!!! I was stamping with in seconds! Getting a little off track here, huh? sorry ;)

Here are the colors:
Beautiful, huh?

chocolate chip, regal rose, pirouette pink, certainly celery, very vanilla

What's not to love about these colors?????

Here is what I came up with at 5:00 AM!!! What is wrong with me....I should have been sleeping!!! God knows I won't be getting a nap today....my little one won't let that happen. She is a non napper...just ask her how she feels about taking a nap...she is not interested. lol!!!


sorry about that aweful shadow on the left......the celery layer is at the edge of the card base.
My base is chocolate chip. I stamped the top edge with the larger dots from Itty Bitty Backgrounds in chocolate chip ink. Next I took a celery panel and wheeled the new cupcakes wheel in certainly celery ink on a diagonal. I then accented each cupcake and the circle confetti with my white gel pen. I wanted to pull some of that new luscious pink pirouette from my main image panels to the celery layer...so I punched 1/4 inch circles and adhered them with tombo mono multi glue...all lined up in a row like cupcakes on a tray....lol!!!! Just kiddin'....I really didn't mean for them to look like cupcakes...I just like things of three lined up...lol!!!

So on for those two regal rose strips....I tor the bottom edges and rolled them up, kinda like those blower things at parties, for dimension.

Now the fun part...the main panel:

I stamped the cupcake and sentiment with basic brown on very vanilla. I colored in the image with a blender pen and ink refills. Here is where I cheated the color challenge a little...I had to do the liner in grey...I don't know why....I just wanted it that way....sorry if I offended any of you die hard challengers....I really am!

Did you notice the flame??? I colored it in with summer sun and then made a very light glow around it before putting dazzling diamonds on it with my 2 way glue pen. And the "sprinkles"....Aren't they darling? I colored in the rectangle ones in with chocolate chip...who doesn't love plain, regular chocolate jimmies???? And for the circle ones...I pulled out my beloved bead dou in pink that I have been hoarding and adhered some two toned pink beads with tombo mono multi. Why would a person hoard beads???? I don't know....you get tons of them in a pack....and I used a whole 7 here....And to look at the package...The naked eye wouldn't even realize that there were 7 missing....I need to stop hoarding!!!! And you know what???? If I bring my self to completely empty a container of beads...7 at a time....I can order more!!! Why aren't all of you holding me to my New Year's resolution to stop hoarding awesome stampin' supplies???? Come on....I needed you....

Anyway...that panel was matted with chocolate chip ad then pink pirouette. I mounted that up on, none other than, stampin' dimensionals!

What do you think??? Let me know...I am in need of comfort now...I used 7 beads after all!!!

Friday, August 22, 2008

Blogger's Challenge - week 61

Well.....Today's eye candy is inspired by the blogger's challenge. It is a color challenge this week. We were to use chocolate chip, ruby red, more mustard and old olive. And since my new baby arrived this week, the Big Shot, I had to use it today too.
Wanna know something?? And those of you that know me personally know that I am. not. a. night owl!!! However, I was up until 1:30 playing in my stamping room!!! That Big Shot may kill me!!! This morning I am paying for it.....The little one doesn't really care what time I went to bed. As a matter of fact, she gets up pretty much at the same time even if she were to have went to bed at 1:30..... I will need lots of coke zero and tea today...lol!!!!

Well, enough feeling sorry for myself. Here is the card for the day:


The base is more mustard (check). I stamped it along the bottom with Upsey Daisy. This set is one of the sets on sale in Stampin' Up!'s "Never Seen Before Sale," be sure to click on the flyer on my side bar. There are some must have sets on that list!!!

My main panel was vanilla and ruby red (check) cut from the exclusive top note die in the Big Shot. Did I mention....I {luv} my new Big Shot. I really do.....
I stamped the Upsey Daisy in chocolate chip (check) and then sponged More mustard and ruby red all over in varying depths. The sentiment is also from Upsey Daisy, it was stamped in Chocolate chip.

Now for the ribbon treatment. I layed my ribbon over the main panel where I wanted it to come through and made two little pencil marks. I then took my cutting mat and hobby blade and cut a little slit in it. Thread the old olive (check) 5/8 inch grosgrain ribbon through.....adhere main panel with stampin dimensionals....tie knot. Done!

Ok...so let's have a recap - chocolate chip (check), more mustard (check), ruby red (check), old olive (check).
Wondering what all the (check)-ing is all about??? Well, my little one wanted "Honey my Bee" (The Bee Movie to the rest of the world....) for her birthday and "Krist and Bridgette" (as she calls them...she says Bridgette very well....but she combines the Kris/Kristen that the rest of us call him into her own nick name.) totally came through with it along with a polar bear that she asked for...where did that come from???? I think she already knows that Kris always knows someone that knows someone that can hook you up with weird things like a polar bear. lol!!! Well....I can tell you it has been played here every day since August 2nd at least 4 times a day. I think we had a break through yesterday though. She was looking at her Barbi Mariposa movie and when "Honey my Bee" was over she said can we put this movie in while holding up her book!!! I jumped right up to go to the Barbi movie. Wow...I really got off track, huh??? Any way...during The Bee Movie ( a very funny movie, by the way!) , when Barry gets ready to go out with the pollen jocks for the first time, until this day...he has never been outside of the hive. The bees all line up military style and go over their check list, like "stinger...check" - things like that, and each bee says "check" and it comes to Barry (main bee in the movie, voice by Jerry Seinfeld - hilarious!!!) and he says "Scared out of my shorts....CHECK!!!" It is a funny part of the movie. But as I type all of this....I am thinking you had to be here to see it! So.....since I can recite The Bee Movie.....when I have a list now....like in the grocery store...I am like....bread - check!....milk - check!.....cereal - check!...You get the picture. Ok....I have rambled enough!!!!!

Let me know what you think of the challenge card (check) ....see I can't help myself!!!!! LOL!!!!!

Thursday, August 21, 2008

I have been hit....

...with the Big Shot!!! I will spare you the song..... I did get to play a little last night...and let me tell you....this is my favorite cutting system that I own! The others are going into the sale bin!


Wanna see what I made last night...I cranked it out in no time at all!!! {pun intended....cranked it out...lol!!!} That just came to me! Ok, enough of my dumb jokes......


The card base is kiwi kiss....sooooo yummy!!!! See that die cut center??? That is the new top note die!!! I love this die....you will be seeing quite a bit of it! (That was your warning....)

Anyway, i cut the top note in two colors, riding hood red and confetti white. The die is designed to give you a perforated edge...which is lovely all by itself....but I cut the edge off of the confetti white one and matted them together. Oh my....my heart is racing!!! The only stamping I did here was the sentiment, from Upsy Daisy in chocolate chip, and the flourish leaves, from Stitched Exotics in kiwi kiss. The flower were all die cut, from the birds and blooms sizzlet die set in the starter kit using bella rose designer series paper. I did, however, use my boho blossom punch for the 2 flower centers on the polka dot kiwi kiss flower to change it up a little. Don't the dies and punch work well together? I think they do. Two of the flowers were mounted up on stampin dimensionals...of course {wink, wink}. Oh yeah...the polka dot chocolate chip panel is also from bella rose designer series paper. That is one beautiful collection of paper!!!!


If you are looking for ways to speed up your paper crafting...the Big Shot is definitely for you.


It took me longer to layout the flowers than to cut out and stamp this entire card. I was able to do two entire cards before my husband said "are you done in there yet????" I will show you my other one tomorrow....and if I get a chance to sneak up there again today....I will not hold out on you....I'll post it! I owe you a few posts for the lack of posting lately....don't think I didn't notice! lol!!!

Wednesday, August 20, 2008

Witching you.....

.....a card to look at before my big shot arrives today!!!! If you didn't see yesterday's post on the big shot...be sure to scroll down right after this post.

I took inspiration for this card from a sketch challenge. I have been wanting to make up some Halloween cards before my order came from the new catalog because I figured I would forget all about the stamps and goodies I already own to play with the new. Do you do that???? And really, I didn't even order that many new stamps. I'm just anxious to play with anything new....


The scalloped circle was made by cutting on an odd number of the coluzzle circles and using my 3/16th corner rounder to scallop the edges. There are scallop circle dies coming the big shot, so I won't have to do this any more.....but you all know I will probably still do it on occasion....I can't imagine not using my corner rounder to pretty something up.....


The card base is lavender lace. No, that is not a new color....it is in the soft subtles family. lol!!! I just don't pull it out very much. The witch kitty is from Haunting Halloween. It was stamped onto confetti white and water colored with ink refills and an aquapainter. She was cut out with the coluzzle as well leaving the hat stick out of the circle. I like to do this technique with circles and ovals. Give it a try.

The sentiment is also from the same set. I punched it out with the oval punch and matted it onto a 1 1/4 circle punch of pumpkin pie and a 1 3/8 circle of lavender lace. I accented the circles and scallop circle with simply making dots with my basic black stampin' write journaler. In the upper right corner....I decided that I needed to pull some pumpkin pie from the lower corner...so what is the easiest way to do that? Brad washers! See my tutorial HERE on how to make these.


Did you notice the bling on that basic black panel? It was so hard to capture on film....but trust me, in real life - it is super sparkly!! I stamped the star/dot from Haunting Halloween in basic black craft ink and embossed it with irredescent ice embossing powder and the heat tool.


That about sums it up for this little kitty....My order is due in today with my big shot...hopefully my little one will cooperate enough for me to get to play. Oh why, oh why doesn't she take naps any more????? I think it is a conspiracy that her daddy and she have against me....no down time for me! lol!!!

Tuesday, August 19, 2008

Hit me with your "Big Shot"......

Why don't you hit me with your "Big Shot?"
Hit me with your "Big Shot".....Fire away!!!!!!
Well...it should be hit me with your best shot....but you know how it is.....
Would you have guessed that my big shot is being delivered tomorrow!?!??!? And I wouldn't want to be UPS if it doesn't come......lol!!!


So I thought I would show you the list of materials you can cut with the Big Shot:


Brass (.055)
Light weight steel
Aluminum (.016)
Tin (.008)
Aircraft plywood (1/64")
Basswood (1/16")
Balsa (3/32")
Paperwood
Mat board (adhesive or none)
Chipboard
Fabric
Silicone
Foam with chipboard (.1)
Corrugated pad
Adhesive-backed cork
Fine sandpaper (.00)
Strene
Extra thick template plastic
Template plastic
Plastic canvas (7 mesh)
Bubble wrap
Sheet foam
Friendly (jewelry) plastic
100% pure beeswax (cut with parchment paper on top & bottom of beeswax)
Adhesive and non-adhesive rubber
Ruffleboard
Static cling vinyl
Warm & natural batting
Fusible fleece
Quilt batting
Adhesive and non-adhesive flexible magnet
Heat n' shrink plastic
Adhesive and non-adhesive felt
Pop-up sponge
Shiny self-adhesive and non-adhesive paper
Iron-on fabric
Poly foam adhesive and non adhesive
3-D illusionary plastic
Glow in the dark adhesive and non adhesive
Suede paper
Funky fur
Personal Embossing Plastic (PEP)
Shaggy plush felt
Canvas
Vinyl flooring
Shelf lining
Placement
Embossing rubber
Thin leather
Gasket material


Now that's a lot of stuff!!!!


And as for card stock and designer series paper, you can cut multiple sheets at a time!! Can I get a Whoop whoop!!!!? Or as Lauren would say - a "hoo hoo!"


Want to see a teaser of some projects made with the Big Shot?


You can make a coordinating outfit in a matter of minutes! I can see my little girl getting a new outfit from me real soon.....and as far as tote bags go.....we all need one of them!!!

Friday, August 15, 2008

Blogger's Challenge - week 60!

Happy Birthday!!! - That is this week's blogger's challenge! It also is Bridgette's birthday today - Happy Birthday to you!!!!!

This is the card I made for her. She loves horses, has one of her own that she enjoys riding any free chance she gets. It would be a peaceful thing to ride through trails taking in the beauty of nature....if I weren't afraid to ride the horse!! lol!!! So, for me, it wouldn't be so peaceful...but you get the picture! ;)


The main image is stamped with black craft ink and embossed with black embossing powder on glossy card stock. I masked the "moon" and sponged the night sky with baja breeze, not quite navy and night of navy.


Did you notice the concho type medallion in the corner?


It is made by layering a black punch from the snow blossom punch, a 1/2 inch punch out of baja breeze and finally a star brad from the styled silver hodgepodge hardware. I {heart} the new hardware!!!! It is so much more fun to work with than the retired hardware....I {love} the detailed pieces in the new collection!!!! Any way....did you notice the "enamel look" of the star? I did that by putting a tiny bit (I mean tiny...I applied it with a straight pin) of crystal effects into the star. I then took my straight pin and added color from my night of navy reinker to the crystal effects and stirred it around until the color was consistent and spread it out into the star. I set it aside to dry. (I actually did this after it was in the card....so it was a one time shot....I would recommend doing this and standing your brad straight up in a corkboard or stiff foam until it dries)


Here's a closer look at the beautiful details of the hardware.....love it!


Happy stampin' ya'll!

Tuesday, August 12, 2008

Another sweet monkey love......

I really do love this stamp set, Sock Monkey, I must say. When I first saw it, I was there is no way I'd order that....the more times I would look at it I would think well, it is kind of cute. And then when placing my order.....I had to have it! I fell in love....sweet monkey love!


This was the initial way I had in mind to color this little guy...after watercoloring, of course! lol! Sock monkeys look like a bunch of tiny dots in real life, right? He is paper pieced with confetti cream for his hands, feet and face.


The bananas were colored with white craft ink and a blender pen. I matted that layer onto very vanilla and then made a scalloped panel out of the new In Color - Tangerine Tango!!! hint: I made that layer using the brand new scalloped edge punch. It is not perfect, I know...but I am working on perfecting it! I used the 1/8th handheld circle punch to thread my vanilla taffeta ribbon through...tied a simple knot...and voila--monkey love! Did I mention that the card base is kraft?

Monday, August 11, 2008

well....my order is in!

The tension has surpassed! I was finally able to give Stampin' Up! my right arm for my first order....I have no self control for stampin' supplies!

Now I sit and wait.....for UPS to bring it to me. Hopefully it won't be two and a half weeks like the first day of retirement and preorders......Please - don't be that long! I could have paid for expedited shipping....but I would rather spend that extra money on more stamps other than higher shipping amounts. In two days when my stampin' buddies get their expedited orders and are using new stuff...I will kick myself.

Well, off to do more studying of the new catalog! Who needs clean laundry???? lol!

The tension is mounting!!!!!

The new catalog goes live at noon today - MOUNTAIN TIME!!!!! Come on Stampin' Up! Don't you know that is 2:00 pm here????? This is like torture!!! I am ordering my big shot and accessories today!!!! I need new stuff!

If you picked up your copy of the Idea Book and Catalog from me - what do you think? Each catalog blows the other one's away, in my opinion! I look and drool...look and drool....wish and dream....pine over each page thinking of ideas of what I would do with each set! I do not have a problem! You won't get me to admit anything! lol!!! I have so many stamp camp ideas rolling around in my little head and stamp club things I want to do....so many ideas, so little time! Sleep is underrated, right?

Stay tuned -
I am working on ribbon share information and a club where you can earn you Big Shot over a 4 month period and earn extra freebies!!!!!

OH MY......My ordering is yearning to be entered in the computer!

NOTE: Check out all of the new links on the left hand side of my blog! Never Seen Before Sale, a Recruiting Special and after the New Idea Book and Catalog goes live - you will be able to access it right from here! (Just click on the picture)

I have also included a link to my favorite Stampin Up Color Combo Chart!!!!!

Sunday, August 10, 2008

Click on the links below to access retirement lists and sale flyers:

Retirement list - Alphabetical
Retirement List - Numerical

Retired Accessories List

Sale on Selected Retiring Accessories


Kits for sale:

Bracelets to Go

Friday, August 8, 2008

Finally!!!

They're here!!!!


If you are a club member...feel free to contact me to get your copy before clubs next week!!!


Our copies aren't spiral bound....this is a picture from Convention - Convention goers are spiral bound already! :)

Wednesday, August 6, 2008

oooo....let the previews resume!!!!

Today's card comes straight from a Simply Sent Card Element Kit called Flower Power. It coordinates with the stamp set Wow Flowers. Both will be available in the upcoming 2008/2009 Fall Winter Idea Book and Catalog. Oh how I can't wait to get my paws on it!!!!!


Now back to what a Simply Sent Card Element Kit is.....

Well, I can only tell you what this kit is....I haven't seen any others. It comes with enough supplies to create six cards, three designs - two of each. This is one of the recommended designs. But you know....I couldn't totally stick with the recommended designs...so you will see some "strayed" designs coming in other days. The card stock bases are textured card stock....oh Stampin' Up! how we long to be able to buy textured card stock in 8 1/2 x 11.....please....... And the kit comes with double sides designer paper and all the accessories to complete the cards...this kit came with mustard brads, mustard and olive buttons, and white and mustard grosgrain ribbon.


I did stamp this card with the sentiment "happy birthday" from Wow Flowers in elegant eggplant. oh yeah....another "stray" from Stampin' Up! design.....the ribbon was recommended to be in a row, where it is, but stapled to the card. Instead, i adhered one side down with sticky tape and put a single knot on the other end and adhered that down with mini glue dots.


See those adornments??? Those are the adhesive die cuts that are in the kit too!!!! Makes card making super easy!!!!! Quick Too!!!!!


What do you think?

Saturday, August 2, 2008

UNBELIEVABLE!!!!!!!

You guys won't believe what was just released at Convention yesterday!!! I wasn't there, but my upline called me to confirm that the rumors were true.....hi Pam! :)

Stampin' Up! has joined up with Sizzix!!!! We will be now carrying an exclusive die cutting system and Stampin' Up! exclusive dies that coordinate with our stamp sets!!!!! How unbelievable is this????? From what I understand customers will be able to order these things beginning September 2.

Wait until you see the dies....oh my!!! Some of my favorites are scalloped circles (larger than our punches!!!!), border dies, a little scalloped envelope die that puts the score lines right on your cut out, pennant dies....and too many more to even remember off hand.

I know that this will be a definite must for card makers and scrap bookers alike!!! I can't wait to get my new lot of goodies!!!!! And you want to know what?????? Our system cuts any other dies already on the market!!!! And with the steel dies you can cut multiple sheets of card stock at a time....and oh yeah....you can cut 50 different materials with this system!!

Oh...I am too excited about this!!!

Can I get a woop woop???? (Or a "hoo hoo" as my daughter says!!! lol)

Wednesday, July 30, 2008

Give me some "monkey" love.......

Some Sock Monkey love, that is!!! Get your minds out of the gutters!!!!! How could you not love this little guy?

Don't you just love that little sock monkey??? It will be available in the upcoming 2008/2009 Fall & Winter Idea Book and Catalog. I knew as soon as I saw it...I wanted to watercolor it, of course, and another coloring technique I will show you another time.....


There are so many new things on this card.....let's see....
first off - all of the stamps are from from Sock Monkey....so cute!!!
And some new In Colors....the card base is Baja Breeze and those mats around the monkey and the sentiment circle are Riding Hood Red - all to die for!!!!
ooo.....and the designer series paper....the chocolate chip with white polka dots.....oh my....that is from Bella Rose Designer Series Paper - A MUST HAVE!!!!
did you see that scalloped edge??? Yes....that is the scalloped edge punch at work!!!! ANOTHER MUST HAVE!!!!!
I threw in a few oldies, but goodies too! The close to cocoa mat, very vanilla (sentiment panel) and watercolor paper.....and of course the aquapainter and ink refills to watercolor with....most of the refills were the new in colors....delish!!!!

Tuesday, July 29, 2008

Happy Birthday Sweet Heart!!!

Today's post has been brought to you by the number 3!

Today is my little girl's third birthday......I can't believe it!!!!

We are off eating her birthday breakfast with Elmo...I hope she enjoys that! We had to buy a breakfast character meal because it was the only meal that guaranteed that Elmo would be there....so breakfast it is! Last year we had an Elmo party...we should have done the same this year since we are spending her birthday at Sesame Place...but she wanted a Hello Kitty party! What is it with her and Hello Kitty???? That is what her "Big Girl Room" had to be when we converted her crib to a full bed...Hello Kitty! Let me tell you...it wasn't easy to decorate a Hello Kitty bedroom on a "non - collector" budget! But we are mustering through it! So anyway...she wanted a Hello Kitty party...so in the middle of our Sesame Street week...we have Hello Kitty! oh well!


We took presents with us for her to open on her birthday and her card....had to be Hello Kitty, right??? Well...I wanted to stamp her card....but came up empty with finding hello Kitty rubber stamps that you could make a card with.....so I turned to scrapbooking supplies. If seeing something on my blog that isn't totally Stampin'Up! makes you sad...turn your eyes away! There are Stampin' Up! things on here...but there are other things as well. lol!!


Close up of the balloons:


They were cut with one of my many die cut systems....lol! the "3" is from Stampin' Up!'s chipboard set- Lots of letters. I covered it with Tombo Mono Multi and chunky glitter from the spring mini catalog (retired...). The balloon strings are silver embroidery floss. I have been doing counted cross stitch for as long as I can remember, so there isn't a shortage of stitchin' supplies around here!


The sentiment is from Hugs and Wishes.


The Kitty is a Sticker, I adhered it to white card stock and cut it out...popped it up onto pop up glue dots...voila!


My accents at the bottom are flowers from the Three For You punch accented with black brads. I lined them up with my mat pack and piercer.


3 balloons, number 3, 3 flowers, 3 brads.....my little girl is 3!!!

Friday, July 25, 2008

Blogger's Challenge - Week 57 MERRY CHRISTMAS!!!!

Merry Christmas (in July) to all of you!!!! This weeks' Blogger's Challenge was Christmas in July. if you haven't seen my Christmas Eve post...be sure to scroll down and check it out too!

Today's post uses the same box as yesterday but I made a set of three ornaments for our Pastor at church. There has been alot of talk among demonstrators on what they hope makes the new catalog from the past mini catalogs....on the top of my list from last years' Holiday Mini Catalog in Holy Tryptich and the Christmas sentiment- the name escapes me!!!! anyone remember what it was called???? It has a lot of beautiful Holiday sentiments......had a star stamp......oh well....it will come back to me...or I will have to go upstairs and see. Near and Far, Follow His Star....is that it?

Here is the ensemble:


closer look at the gift box:


Anyway....The ornaments are stamped on white chipboard coasters and I watercolored them with my aquapainter and ink refills. and all of them were "blinged" up with a 2 way glue pen and dazzling diamonds.

close ups of the ornaments:


Merry Christmas to all of you!!!!